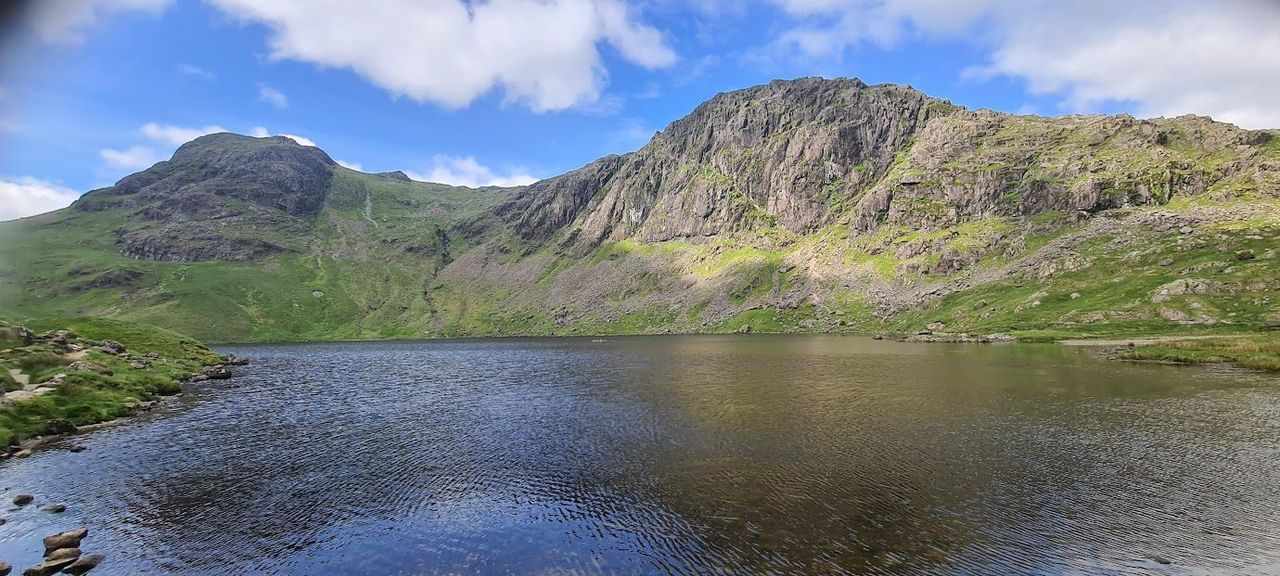
West of Grasmere
Photo: © Lee McCoy
Key facts
Difficulty profile
Five independent axes, not one score — all field-checked on the ground here, with nothing left as a desk estimate.
Conditions on this route
We score every Lakeland Wainwright each morning on cloud, wind, rain and underfoot, and this route crosses 4 of them. The worst summit governs the verdict — a route is only as kind as its roughest top.
Modelled guidance — not a substitute for the mountain forecast or your own judgement. See how every fell ranks today →
Daylight & turnaround
Daylight is short from October to February — check today’s sunrise and sunset before you set off, and carry a head-torch and spare batteries. On short days, decide your turn-back time before you start.
Why this matters: 78% of Mountain Rescue call-outs come after midday — the day runs out on the way home, not on the way up. See also walking in bad weather and today’s conditions.
1 Tarn Crag (Easedale)2 Codale Head3 Sergeant Man4 Blea Rigg5 Swinescar Pike6 Silver How
Easy 83%Moderate 15%Hard 3%Severe
Free mapping: OpenTopoMap / OpenStreetMap (switch layers top-right).
This walk covers about 15.44 km with around 806 m of ascent, taking in 6 summits. The map above shows the line; the elevation profile and stage notes are below.
Access & barriers
Can a dog, a buggy or dodgy knees manage this route? A quick read from the gates and stiles mapped along the way.
- Dog: Gates and kissing gates only — a dog can do the whole route.
- Buggy: Stiles or rough going on the route.
- Knees: A sustained ~30% descent around the 13.7 km mark — a little jarring on tired knees.
On the line: 13 gates · 3 kissing gates
These are mapped barriers, from OpenStreetMap — coverage in the Lakes is good but not guaranteed complete. Spotted a stile or gate we’ve missed? Tell us (opens in new tab) and we’ll fix it. Barrier data as of 2026-07-20. Access data © OpenStreetMap contributors (via Overpass).
Pacing
| Summit | Cumulative | Ascent | Time (fast–steady) |
|---|---|---|---|
| 1Tarn Crag (Easedale) | 5.1 km | 489 m | 1:50–2:26 |
| 2Codale Head | 6.7 km | 706 m | 2:31–3:21 |
| 3Sergeant Man | 7.2 km | 721 m | 2:39–3:31 |
| 4Blea Rigg | 9.4 km | 721 m | 3:04–4:05 |
| 5Swinescar Pike | 11.5 km | 763 m | 3:34–4:45 |
| 6Silver How | 12.9 km | 795 m | 3:54–5:11 |
| Finish | 15.4 km | 806 m | 4:26–5:54 |
Naismith-based estimate — a fast/steady range. Your pace will vary. These use Naismith’s textbook constants (5 km/h, 600 m of ascent an hour). Measured against a pace fitted to 41 recorded Lakeland walks they run about 8% slow, and we have left them that way deliberately: a slow estimate strands nobody.
The walk, stage by stage
- 1
Start → Tarn Crag (Easedale) (5.1 km, 489 m)
Leave Grasmere and head up the Easedale valley. Follow the well-made path past the cascades of Sour Milk Gill up to Easedale Tarn. From the tarn, leave the main thoroughfare and tackle the steep, rocky, and often wet ascent up the eastern flanks to the summit of Tarn Crag
WaypointsGrasmere Village, Sour Milk Gill, Easedale Tarn, Tarn Crag summit
Decision pointEasedale Tarn serves as a massive water handrail. Aim for the craggy high ground looming directly behind it
Easy to get wrongA long 5.1 km approach. The initial walk to the tarn is heavily trafficked and pitched with stone, but the final 10% pull up Tarn Crag is rough, far less defined, and demands a significant shift in effort
If you need to get offTurn around and descend the clear, well-trodden paths back from Easedale Tarn to Grasmere


© Lee McCoy · 2 photographs - 2
Tarn Crag (Easedale) → Codale Head (1.6 km, 217 m)
Head west from Tarn Crag across the broad, boggy watershed. Pick a line up the steepening, pathless grassy slopes to reach the high, undulating summit of Codale Head
WaypointsTarn Crag summit, Codale Head
Decision pointFollow faint trods where visible, keeping a general westerly bearing toward the rising skyline
Easy to get wrongThis is a tough 14% climb over often trackless and very wet ground. The terrain is deeply boggy and energy-sapping, making it a pure physical slog with little rocky interest
If you need to get offRetreat to Tarn Crag; dropping directly off the flanks here into the remote valleys below is steep and trackless
- 3
Codale Head → Sergeant Man (0.5 km, 15 m)
A short, undulating stroll south-west across the high grassy plateau to the prominent, rocky nipple of Sergeant Man
WaypointsCodale Head, Sergeant Man summit
Decision pointSergeant Man is a striking, rocky prominence that stands out clearly from the surrounding grassy dome, serving as an unmistakable visual target
Easy to get wrongMechanically very easy after the slog to Codale Head, but this high plateau is fully exposed to the prevailing winds
If you need to get offPush forward; you are at the apex of the route with no immediate, safe valley descents
- 4
Sergeant Man → Blea Rigg (2.1 km, 0 m)
Descend south-east from Sergeant Man, navigating a complex, undulating ridge line composed of numerous rocky outcrops, boggy hollows, and false summits until reaching the true top of Blea Rigg
WaypointsSergeant Man descent, Blea Rigg summit
Decision pointKeep the Easedale valley well down to your left (east). Weave between the outcrops while maintaining a strict south-easterly heading
Easy to get wrongThis 2.1 km section is notoriously confusing. The ridge is a chaotic jumble of knolls and tarns. While the net elevation is a descent, the constant up-and-down over rocky bumps is incredibly tiring. Checking my Garmin fēnix 6 Pro is always handy here to confirm I'm actually on the true summit, as several rocky bumps vie for the title
If you need to get offFrom the ridge, you can carefully pick your way down the slopes to the left towards Easedale Tarn, though the ground is steep, pathless, and rough

© Lee McCoy - 5
Blea Rigg → Swinescar Pike (2.1 km, 42 m)
Continue south-east along the knobbly ridge, dropping into marshy depressions and crossing over the minor, rocky bump of Swinescar Pike
WaypointsBlea Rigg, Lang How (skirted), Swinescar Pike
Decision pointFollow the braided paths along the crest, keeping the view of Grasmere in sight ahead
Easy to get wrongMore of the same complex terrain. The dips hold water and require weaving to keep boots dry, though the main path becomes slightly more defined as you progress
If you need to get offPush forward towards Silver How for the safest descent path
- 6
Swinescar Pike → Silver How (1.4 km, 33 m)
A short, undulating walk across the final stretch of the ridge to the highly popular, grassy and rocky summit of Silver How
WaypointsSwinescar Pike, Silver How summit
Decision pointThe paths funnel together as you approach the prominent summit of Silver How
Easy to get wrongEasy walking on increasingly clear, heavily trodden paths. Silver How offers one of the absolute best vantage points in the Lakes, looking directly down over Grasmere and Rydal Water
If you need to get offYou are on the final fell; proceed to the main descent

© Lee McCoy Silver How → Finish (2.6 km, 11 m)
Descend the steep, often pitched eastern paths down the nose of Silver How. Follow the clear trails into the woods around Allan Bank, and walk the lanes directly back into the center of Grasmere
WaypointsSilver How descent, Allan Bank woodland, Grasmere Village finish
Decision pointThe village of Grasmere is visible for almost the entire descent, acting as a massive visual magnet. The tracks through the lower woods are clearly marked
Easy to get wrongA rapid 314 m descent. The path is heavily trafficked, well-maintained, and stepped in places, but the steep gradient is a final, jarring test for tired knees
If you need to get offYou are on the final exit route; simply continue down to the village


© Lee McCoy · 2 photographs
Summits bagged (6)
- 1Tarn Crag (Easedale)549 m
- 2Codale Head732 m
- 3Sergeant Man736 m
- 4Blea Rigg542 m
- 5Swinescar Pike411 m
- 6Silver How394 m
In the order you walk them — the same numbers the elevation profile, the stage notes and the pacing table use.
Getting there & parking
⚡ Driving an electric car? Grasmere village (paid) has a verified public charger 216 m away — Grasmere Stock Lane (LA22 9SJ), 3 kW. Over about 4.4 hours on the hill that is up to 13 kWh, which is a ceiling and not a promise. EV charging at this start → (checked 2026-08-05).
Positions are approximate. Lakeland car parks fill before 9am on fine weekends.
Vehicles are left entirely at their owner’s risk. We list places people park; we cannot vouch for any of them. Judge it on the day: take valuables with you, leave nothing on show, and if a spot feels wrong when you get there, park somewhere else.
Every option near this start, on the parking map →
Water, shelter & getting away
On-route facilities © OpenStreetMap contributors — an absent marker does not mean the facility isn’t there.
Buses
The 555 stops at Grasmere, opposite Heaton Cooper Studio, 320 m from this start. Last bus: Monday to Friday 23:01 towards Kendal (555) and 21:53 towards Ambleside (555) and 20:53 towards Windermere (555) and 19:15 towards Bowness on Windermere (599); Saturday 23:01 towards Kendal (555) and 21:53 towards Ambleside (555) and 20:53 towards Windermere (555) and 19:15 towards Bowness on Windermere (599); Sunday 20:00 towards Windermere (555) and 19:30 towards Kendal (555) and 19:15 towards Bowness on Windermere (599). Checked against the operator’s timetable, 7 September 2026. Times here are a guide, not a promise — leave yourself more than the minute.
The 555 passes this route at 0.4 km (Grasmere, opposite Heaton Cooper Studio, 30 m off the line). Other services cross it too — 516 at 11.1 km.
Rural routes change seasonally — confirm on stagecoachbus.com (opens in new tab) or Traveline before travelling.
If the parking is full
There is no real plan B here. Every place we know beside this route serves the same walks and sits close together, so if one is full the others usually are too. Worth starting early, or having a different walk in mind before you set off.
- Stock Lane Car & Coach Park (LDNPA, paid)
- Grasmere, roadside layby (free)
- Silver How (layby)
Worked out from the parking we hold within walking reach of this route and the other walks each place serves — two places that serve the same walks fill for the same reasons. We are not saying whether anywhere has spaces today, and we never will: this is what exists, not what is free.
When the sun reaches the tops
Not sunrise — the moment the sun clears the skyline from that summit, which on a fell with high ground to its east can be a good deal later. The two equinoxes are shown because they fall in the walking season, and late December too wherever a top keeps you waiting then; the clock gap between the equinoxes is British Summer Time, not the hill. Rounded to the nearest quarter hour and meant as a general idea, not a schedule.
- Tarn Crag (Easedale) — in late March the sun reaches it around 06:30, with the sunrise. In late September, about 07:00. It waits longest in midsummer — about half an hour after sunrise.
- Sergeant Man — in late March the sun reaches it around 06:15, with the sunrise. In late September, about 07:00. It waits longest in midsummer — about a quarter of an hour after sunrise.
- Blea Rigg — in late March the sun reaches it around 06:15, with the sunrise. In late September, about 07:00. It waits longest in midsummer — about a quarter of an hour after sunrise.
- Silver How — in late March the sun reaches it around 06:30, with the sunrise. In late September, about 07:15. It waits longest in midsummer — about half an hour after sunrise.
Modelled from a 30 m elevation model against each summit’s own skyline — the same figures the fell pages carry, never observed. Cloud is not in it.
Safety & conditions
Check live conditions in the “From the fells” panel, on MWIS (opens in new tab) and the Met Office mountain forecast (opens in new tab) before you set off.
Make it easier or harder
Short version: turn back at about 6.7 km (drop to Start) — roughly half the distance.
Places to stay near this start
From Grasmere: 11 places