Lake District Navigation: The Complete Field Guide to Map, Compass & Digital Tools
Everything I wish I'd properly understood before the day a watch on the top of Dollywaggon Pike tried to send me over the edge.
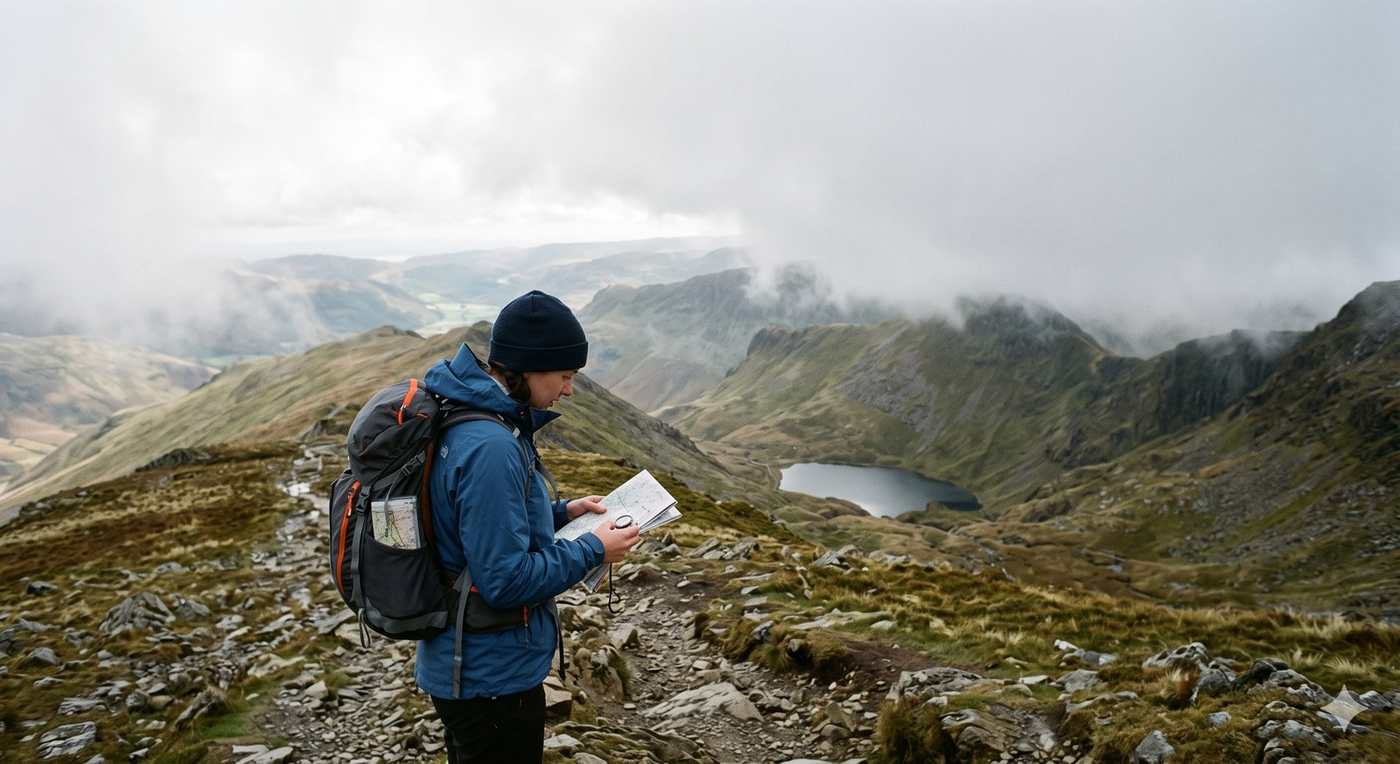
There is a particular kind of silence that falls when the cloud comes down on a Lakeland summit. The view collapses to a few metres of wet rock, the wind takes your hearing, and every instinct you have about which way is "down" becomes a coin toss. In that moment, navigation stops being a hobby skill and becomes the thing that gets you home.
This guide brings together two things. The first is the fundamentals — map, compass, contours, grid references — taught the way the Ordnance Survey (opens in new tab) teaches them, because that body of knowledge is the bedrock and you should learn it from the people who literally drew the map. The second is what I've learned the hard way navigating these fells with digital tools: which ones have saved me, which one nearly killed me, and exactly where the seductive blue dot stops being your friend.
I've written this to be the most genuinely useful navigation guide for the Lake District you can find. Not the longest list of gear, but the one that tells you the truth about how these tools behave when the weather turns and it matters.
Using this guide safely — the short version
- Download your offline maps before you leave signal, and open the app once at home to check it's logged in and the area is saved — not for the first time in a gale.
- Carry a paper map and compass on the open fell, and know how to use them. They're the only tools here with no battery to die, no signal to lose and no screen to freeze.
- Cross-check your plan against a dedicated mountain forecast (MWIS (opens in new tab) or the Lake District Weatherline) and a second source — never the valley forecast alone.
- Take your descent bearing off the map before you commit to a broad, featureless summit in cloud.
- Tell someone your route and your expected back time, then stick to it — that's how anyone knows you're overdue.
- Carry layered ways to call for help (phone, satellite messenger, a pre-registered 999 text) and assume any one of them might fail.
1. Choosing the right map
Digital tools are revolutionary, but a paper map never runs out of battery, never loses signal and never crashes. Steve from Ordnance Survey makes the point well in the OS "Choosing the Right Map" video: a physical map is an irreplaceable lifesaver precisely because it has no dependencies. Start there. Two scales matter for the Lakes:
- Orange OS Explorer (1:25,000). Every 4 cm on the map is 1 km on the ground. The detail is excellent — field boundaries, individual crags, access land — which makes it the right scale for walking, scrambling and fell running. Buy the paper sheet and you also unlock a digital download of the same map in the OS Maps app.
- Pink OS Landranger (1:50,000). Every 2 cm is 1 km. Less local detail but more ground per sheet — better for driving, planning and the bigger picture than for navigating a fell in mist.
For the Lake District specifically, the National Park is covered by four OS Explorer sheets, and it's worth memorising which is which:
- OL4 — The English Lakes, North-Western area (Buttermere, Borrowdale, Wasdale's western edge). Buy OL4 on Amazon (opens in new tab).
- OL5 — North-Eastern area (Helvellyn, Dollywaggon Pike, Patterdale, Ullswater). This is the sheet for the central and eastern fells; Helvellyn sits at grid reference NY 342 151. Buy OL5 on Amazon (opens in new tab).
- OL6 — South-Western area (Scafell, Coniston, Eskdale). Buy OL6 on Amazon (opens in new tab).
- OL7 — South-Eastern area (Windermere, Kentmere, the far eastern fells). Buy OL7 on Amazon (opens in new tab).
As an Amazon Associate we earn from qualifying purchases — at no extra cost to you. How affiliate links work →
From experience
Buy the Active (laminated) versions. An un-laminated paper map turns to papier-mâché in Lakeland rain within an hour, and the day you most need to take a bearing is exactly the day it's hammering down. A laminated map you can fold to your route, write on with a chinagraph pencil, and shove down your front when both hands are needed for rock.
2. Symbols & the legend
An OS map packs an astonishing amount of landscape into a readable page by using symbols rather than words. Many are intuitive — a tent for a campsite, a "P" for parking, a blue knife-and-fork for refreshments. Others encode genuinely useful terrain detail: the difference between a tussocky carpet of bracken and open grass, between the rounded blobs of deciduous woodland and the little Christmas-tree shapes of coniferous plantation, and the fine blue threads of every stream and beck.
You never have to guess. Every map carries a full legend down the side that defines every icon, colour and line. Two minutes spent reading the legend before you set off is two minutes that turns the map from a picture into a language.
The symbols that earn their keep on the fells
The full set runs to a few hundred symbols, but only a handful do real work on a Lakeland day. These are the ones worth knowing on sight:
- Access land. A pale orange-yellow tint with a darker orange boundary marks open access land you're free to roam under the CRoW Act. Most of the high Lakeland fells are access land — the tint tells you where the "keep to the path" rule relaxes.
- Rights of way. On the orange Explorer, public paths are green: short dashes are a footpath, longer dashes a bridleway (bikes and horses too), and a dash-and-dot line a byway. They're a legal right of access, not a promise the path exists underfoot — up high it often fades to nothing.
- Becks & water. Every blue line is running water. They make the best handrails in mist, but respect them: a thin blue thread can be an impassable torrent after rain, and many fell becks have no safe crossing high up.
- Rock — crag, scree & boulders. The little cliff-drawings, stippled scree and scattered boulders are your hazard layer. Telling crag from open slope before you walk onto it in cloud is the whole reason to read the ground first.
- Marsh & bog. Clumps of little blue tufts mean wet, energy-sapping ground — on the boggier eastern and far-western fells, often worth a detour.
- Tick-points. A blue triangle is a trig pillar; cairns, sheepfolds, wall junctions and field corners are the features you count off to fix your position. Aim to confirm where you are from three independent features, never just one.
Why this matters in the Lakes
In poor visibility, the small symbols become your handrails: a wall, a fence line, a stream junction, a sheepfold. These "tick features" let you confirm progress along a bearing when you can't see fifty metres. Learn to read the becks especially — in the Lakes a stream's direction of flow and the contour it cuts across is often the single most reliable clue to where you actually are.
3. Reading contour lines
Contours are the skill that separates people who can read a map from people who can only locate themselves on one. They are the faint orange-brown lines threading across the map, and each one joins points of equal height above sea level. Every so often a number printed along a line gives you the exact elevation.
- Interval. On OS Explorer maps the vertical gap between lines is usually 10 metres (5 metres in gentler areas — always check the legend).
- Spacing tells you steepness. Lines spread far apart mean a gentle slope; lines crammed tightly together mean a steep face or crag. When they almost touch, treat it as cliff until proven otherwise.
- Shape tells you the landform. Contours that bulge outward and downhill are a spur or ridge; contours that bite inward and uphill are a gully or valley. In mist, knowing whether the ground falls away to your left as a spur or a gully is often the difference between the right descent and a cliff edge. The four shapes below are the ones worth knowing on sight.
The whole point is to turn a flat sheet into a three-dimensional picture in your head before your boots ever test it. On the Lakeland fells, where summit plateaus drop into precipitous east faces with very little warning, that mental picture is not academic.
4. Grid references
A grid reference pinpoints a location using the blue grid squares on the map. Two levels are worth knowing cold.
Four-figure: the 1 km square
The numbers along the bottom (west to east) are eastings; the numbers up the side (south to north) are northings — put another way, the vertical grid lines carry the easting numbers, the horizontal lines the northings. The old mnemonic fixes the reading order: "along the corridor and up the stairs" — easting first, then northing. And here is the rule that trips up nearly every beginner: a grid reference always names the bottom-left (south-west) corner of the square — read the two lines that meet at that corner, never the ones to its right or top. The square whose south-west corner sits at easting 24, northing 10 is grid square 2410, a single kilometre box.
Six-figure: the 100 m square
A kilometre square is far too big for, say, a rescue call. To go finer, imagine the square divided into a 10 × 10 grid of 100 m boxes. Estimate the tenths: if your point is halfway across, the easting becomes 265; if it's just past halfway up, the northing becomes 166. Combined, that's a precise 100 m reference.
The two-letter prefix
Every reference needs its regional prefix so it can't be confused with an identical number elsewhere in the country. Most of the Lake District sits in the NY grid square (the far south-western fells edge into SD). So Helvellyn's full reference is NY 342 151. If you ever phone or text mountain rescue, this is the number they want — and being able to read it off a paper map when your phone is dead is exactly why this skill still matters.
Here is that same reference, NY 342 151, taken apart — every digit has a job:
- NY — the 100 km square (the Lakes are almost entirely NY; the far south-west edges into SD)
- 34 — the easting line printed on the map
- 2 — tenths east of that line, judged by eye
- 15 — the northing line printed on the map
- 1 — tenths north of that line, judged by eye
Skip the guesswork: the romer scale
Those last digits are an estimate by eye — but you can read them exactly. Most baseplate compasses (a Silva, for instance) have a small romer scale printed into the corner of the baseplate: a nested grid scaled for 1:25,000 (and often 1:40,000) maps. Sit its corner on your point inside the grid square and it lines up with the OS kilometre box, handing you the third and sixth digits straight off — no squinting.
Digital shortcut worth carrying
The free OS Locate app reads out your six-figure (and ten-figure) grid reference from your phone's GPS, with a built-in compass, and it works fully offline. It's the fastest way to give rescuers a precise location — but treat it as the easy option on top of being able to do it from the paper map, not instead of.
5. The compass
A baseplate compass is the fundamental tool for direction. Know its parts:
- Baseplate — the clear plastic base, with ruler edges for measuring distance and plotting grid references.
- Housing / bezel — the rotating ring marked in degrees, with the magnetised needle floating inside.
- Orienting lines & arrow — the parallel lines and the big arrow in the base of the housing, used to line the compass up with the map's grid lines.
- Direction-of-travel arrow — the fixed arrow on the baseplate telling you which way to walk.
- Index line — where you read your bearing off the bezel.
Taking a bearing, step by step
- Connect the points. Lay the baseplate edge on the map so it joins where you are (A) to where you're going (B), with the direction-of-travel arrow pointing toward B.
- Set the bezel. Turn the housing until its orienting lines are parallel with the map's vertical grid lines and the orienting arrow points to the top of the map (grid north).
- Adjust for magnetic variation — see the next section, because for the Lakes in 2026 this step has, remarkably, almost vanished.
- Walk it. Lift the compass off the map, hold it flat, and turn your whole body until the red needle sits inside the orienting arrow — "put red in the shed". Sight along the direction-of-travel arrow to a feature ahead (a boulder, a fence post) and walk to it. Repeat.
The skill that actually saves you
Anyone can take a bearing on the kitchen table. The skill is taking one with cold hands, in driving rain, when you're frightened — and then trusting it over what your gut is screaming. Practise on a clear day on easy ground until it's mechanical, because a fine day is the only time you'll ever learn it. The fells in cloud are the exam, not the lesson.
6. The three norths — and why 2026 changes the rule
Here is where the standard advice has genuinely changed, and where most older guides — and the OS videos themselves — are now out of date. Traditionally you had to correct for the gap between grid north (the map's vertical lines) and magnetic north (where your needle points). That gap is the grid magnetic angle, and the old Lake District rhyme was "Grid to Mag, add" — add a few degrees when converting a map bearing to a compass heading.
That rule is currently obsolete in the Lakes. Magnetic north has been marching eastward for years. In 2014 it crossed grid north for the first time since the 1660s, and through 2025–2026 the "three norths" — true, grid and magnetic — are effectively aligned across Great Britain. The Ordnance Survey and British Geological Survey now advise that the variation is under one degree across the country — small enough to ignore for practical walking for roughly the next decade.
What to actually do in 2026
For Lake District walking right now, set your bearing off the grid and walk it — the correction is within the error of a hand-held compass anyway. But still learn the technique. Variation will grow again (and has already swung magnetic north to the east of grid north, so the old "add" will eventually become "subtract"). Always check the current grid magnetic angle printed in your map's legend or via the BGS calculator, because the map in your hand may have been printed years ago with a now-wrong figure.
7. Digital navigation, first-hand
Now the part you can't get from a textbook. I've navigated these fells through three generations of digital kit, and each one taught me where the limits are. Here's the unvarnished version.
The old Suunto: rudimentary, and oddly useful for it
When I started, I had an old Suunto watch with very basic navigation. The GPS was slow — long delays before it caught up with where I actually was — and its direction cues were vague. The irony is that its very uselessness made me a better navigator: it forced me to rely on the paper map. And map work in bad weather is genuinely hard, which is exactly why it needs practising. One lesson stuck: when you're standing at a junction with several paths fanning out in front of you, being told your heading precisely is everything. A watch that's a few degrees vague is worse than useless there — it gives you false confidence in the wrong gully.
The Garmin Fenix 6 Pro: better, but I no longer trust it alone
I now use a Garmin Fenix 6 Pro, and even it is showing its age. The GPX tracking is slow to respond and not as accurate as I want. That's not just my impression — it's a generational thing. Older single-band GPS receivers can deviate by well over 100 metres in the mountains, where rock faces bounce the signal around. The newer multi-band (dual-frequency) GNSS watches cut that error dramatically — by up to around half — because they can reject those reflected signals. A hundred metres of error on a flat is an inconvenience. A hundred metres of error on a summit plateau is a cliff.
The day it nearly killed me — Dollywaggon Pike
On the top of Dollywaggon Pike, in exceptionally high winds and almost no visibility, my Fenix was telling me to head toward the east face — a direction that would very probably have killed me. Something — call it a sixth sense, call it the contours I'd looked at that morning — stopped me going over the edge. What got me down safely was the OS Maps app on my phone. Crucially, I had checked it was logged in and downloaded the map for offline use before I summited, while I still had signal and a warm hand to do it. It gave me a true bearing for the descent. The watch nearly sent me over; the prepared phone brought me back.
Two things made the phone work that day, and neither was luck:
- Offline maps, downloaded in advance. The OS Maps app (Premium) lets you save map tiles to the phone before you leave home or signal. GPS itself needs no phone signal to fix your position, but the map behind the blue dot does — unless you've downloaded it. Do it the night before, not on the summit.
- It was already logged in and tested. A navigation app you first open in a gale is a navigation app you can't use. Open it, log in, download the area, and check the blue dot tracks you on a local walk first.
Recce the route before you leave the house
The best navigation happens at the kitchen table. Plan the route closely in advance. There are excellent YouTube videos for almost every Lakeland route now, and they do something a map can't: they show you the actual waymarks, the cairns, the path junctions and the true character of the terrain — how steep that "steep bit" really feels, where the path braids and misleads. Watch one or two for your route and you'll arrive already recognising the ground. Pair that with the map and you've effectively walked it once before you start.
The non-negotiables
None of the above replaces the basics. A laminated map and a good compass — and knowing how to use them — are essential, full stop. They are the only tools on this list with no battery, no signal dependency and no software to crash. Everything digital is an aid layered on top of them, not a substitute for them.
8. GPX smartwatch vs paper map: the honest comparison
This is the comparison people actually want, so here it is without the marketing gloss. Both have a place; the mistake is letting the convenient one quietly become the primary one.
| Factor | GPX on a smartwatch | Paper map & compass |
|---|---|---|
| Speed of "where am I?" | Instant blue dot (when it has a good fix) | Requires skill and a moment to relocate |
| Accuracy in mountains | Older single-band: 100 m+ error possible; multi-band much better | As accurate as your map-reading; no signal drift |
| Battery / power | Finite; GPS drains fast, dies in cold | None needed, ever |
| Performance in bad weather | Screen tiny, gloves a problem, but works in cloud/dark | Map degrades if not laminated; hard to handle in wind |
| Big-picture / planning | Poor — you see a small slice around the dot | Excellent — whole route and escape options at a glance |
| Failure mode | Silent & sudden (flat battery, lost fix, frozen screen) | Gradual & obvious (you can see it getting wet) |
| Tells you the terrain ahead | Only if the watch shows contours; many don't well | Yes — contours give the full 3-D picture |
| Learning curve | Low to follow a track; you can be lazy and still move | High, but builds real situational awareness |
| Best role | A backup that confirms your position quickly | Your primary navigation and decision-making tool |
GPX smartwatch — pros
- Near-instant position fix
- Follows a pre-loaded route with off-track alerts
- Works in pitch dark and thick cloud
- Records your track for the return journey
- Hands-free, always on your wrist
GPX smartwatch — cons
- Battery dies — often fastest in the cold, when you need it
- Older units drift badly near crags and faces
- Tiny screen hides the wider terrain and escape routes
- Fails suddenly and silently
- Breeds over-reliance and switched-off awareness
Paper map & compass — pros
- Zero power, zero signal, never crashes
- Whole-route overview for planning and bailing out
- Contours give true 3-D terrain understanding
- Fails gradually and visibly, not all at once
- The skill makes you a genuinely better navigator
Paper map & compass — cons
- Real skill required — and it perishes without practice
- Awkward to handle in high wind and rain
- Un-laminated maps disintegrate when wet
- Slower to pinpoint an exact position than a blue dot
- Useless if you never learned to use it properly
My settled view: map and compass are the primary system; the watch and phone app are confirmation layers. The instant a digital tool starts making the decision rather than confirming one you've already reasoned from the map, you're in the danger zone — Dollywaggon taught me that at close range.
"Navigating with a mobile is a no-no — you just can't replace a map and compass."
— A mountain rescue team leader, quoted by the British Mountaineering Council (opens in new tab)
The limits to plan around — and why redundancy wins
Every tool on this page has a failure mode, and the fells will find it. Plan for all four:
- Battery. A phone or watch dies fastest in exactly the cold, wet conditions where you need it most — carry a power bank, and never let your only navigation depend on a charge level.
- GPS reception. In steep terrain rock faces bounce the signal, and an older single-band receiver can put your blue dot 100 m from where you're standing. On a summit plateau, 100 m is the difference between the path and the edge.
- Human error. The commonest failure isn't the kit — it's following the wrong line off a featureless top, or trusting a heading your gut invented. A bearing taken from the map is the antidote.
- Redundancy is the point. Carry layers that fail differently — paper and compass (no battery), phone with offline maps (GPS), a satellite messenger (no signal) — so no single failure leaves you blind.
9. Planning before you go
Most Lakeland rescues are not dramatic accidents. The mountain rescue teams are blunt about it: in 2025 the majority of their callouts were classed as avoidable — down to poor planning and preparation rather than genuine misfortune, with inexperience, poor decisions and weather the recurring themes. Lake District teams logged a record-breaking year in 2024 (well over 800 callouts, up around 15% on the year before), and Wasdale alone topped 160. Good planning is the cheapest safety equipment you own. Planning a summer day specifically? The season's hazards — heat, water, lightning, cattle — are ranked by evidence in Summer on the Fells.
"In June for example we had a spate of callouts — seven in one week — and three of those were people who had no map and compass with them in misty conditions."
— A mountain rescue team leader, quoted by the British Mountaineering Council (opens in new tab)
Time and distance: Naismith's Rule
To estimate how long a route takes, use Naismith's Rule: allow 15 minutes per kilometre, plus 10 minutes for every 100 m of ascent. Then be honest and pad it: strong wind, driving rain or snow, a heavy pack or tricky navigation can add 25–50%. Knowing your expected time means you know when you're overdue — and so does whoever you left your plan with.
Pacing and timing for poor visibility
When you can't see your next handrail, two techniques keep you honest. Timing: at roughly 4 km/h you cover 100 m in about 90 seconds, so you can time a leg and know when to expect a feature. Pacing: count your double-paces over a measured 100 m on flat ground (most people are 55–75) and you can then measure distance on the hill by counting. Combine a bearing, a timed leg and a pace count and you can navigate accurately through cloud you can't see ten metres into.
Check the mountain weather — not the valley forecast
The conditions on the tops are a different world from the car park. Use a dedicated mountain forecast such as the Mountain Weather Information Service (MWIS) and the Lake District Weatherline, which in winter includes a daily report from the Fell Top Assessors who physically climb Helvellyn to record conditions, including whether you'll need an ice axe and crampons. Plan to the summit forecast, not the valley one.
10. Comms & emergencies — how will you call for help?
Plan your communications the way you plan your route, because large parts of the Lakeland fells have no mobile signal at all — Grisedale, below Helvellyn, is a notorious black hole.
- Satellite communicator. I carry a Garmin inReach Mini 2. It uses the Iridium satellite network for genuine global coverage, sends two-way messages and triggers an SOS to a 24/7 coordination centre even with no phone signal. It needs a subscription, but battery life runs to days. For committing solo days, it's the single best safety buy I've made.
- iPhone satellite SOS. Modern iPhones (14 and later) include Emergency SOS via satellite, which works in the UK to reach 999/112 when you have no signal — free for the first couple of years (currently extended into late 2026). You must be outside with a clear view of the sky, and it's emergency-only here (satellite text messaging to friends isn't available in the UK yet). Know whether your phone has it before you rely on it.
- Text 999. Register your phone in advance (text "register" to 999) so you can send an emergency text when a call won't connect through a weak signal — a text often gets through where a voice call fails.
- what3words and OS grid refs. UK rescue teams accept both. Have OS Locate for the grid reference and what3words on the phone, and know how to read a six-figure reference off the paper map as the no-battery fallback.
- To call mountain rescue: dial 999, ask for Police, then Mountain Rescue, and give your grid reference, number in the party and the nature of the problem.
The principle
Don't carry one way to call for help — carry layers, and assume each might fail. A phone for signal where it exists, a satellite device for where it doesn't, a registered 999 text as the low-signal fallback, and the paper-map grid reference for when everything electronic is dead.
Calling for help is one half of an emergency; knowing what to do while it's on its way is the other. For that — kit, ankle and leg injuries, hypothermia, CPR and the evacuation decision — see this guide's companion, our Lake District first-aid guide.
11. Lake District Mountain Rescue teams & the areas they cover
Mountain rescue in the Lakes is provided entirely by unpaid volunteers, organised under the Lake District Search & Mountain Rescue Association (LDSAMRA) (opens in new tab). An important point first: you never call a team directly, and they deliberately don't publish a 999-style emergency number — that isn't how you reach them.
In an emergency
Dial 999 (or 112), ask for Police, then Mountain Rescue. Give your grid reference (or what3words), the number in your party and the nature of the problem. If a voice call won't connect, send an emergency text to 999 — provided you registered your phone beforehand. The team websites below are for information, safety advice and donations; they are not a way to summon help.
Cumbria is covered by ten mountain rescue teams, backed by a search-dog team and an underground rescue unit. The areas below are indicative: boundaries overlap, and teams routinely cross-assist on long or large incidents, so the team that reaches you may not be the one whose patch you think you're on.
| Team | Broad area & well-known fells | Website |
|---|---|---|
| Keswick MRT | The northern and central fells — Skiddaw, Blencathra, Borrowdale, Derwentwater and Newlands, reaching across to Helvellyn and Great End | keswickmrt.org.uk (opens in new tab) |
| Patterdale MRT | Helvellyn with Striding and Swirral Edge, Fairfield's eastern side, the Ullswater valley and the eastern fells | mountainrescue.org.uk (opens in new tab) |
| Langdale Ambleside MRT | Great Langdale, Ambleside, Grasmere, Windermere and Troutbeck, the central fells, Crinkle Crags and Bowfell | lamrt.org.uk (opens in new tab) |
| Wasdale MRT | The western fells — Scafell Pike, Scafell, Great Gable and Pillar — plus Wasdale and Eskdale; England's busiest team | wmrt.org.uk (opens in new tab) |
| Coniston MRT | The Coniston fells — Old Man, Wetherlam and Swirl How — with Tilberthwaite, Torver and Grizedale | conistonmrt.org.uk (opens in new tab) |
| Cockermouth MRT | The north-western fells — Buttermere, Crummock, Loweswater, Lorton, Grasmoor and Whinlatter | cockermouthmrt.org.uk (opens in new tab) |
| Duddon & Furness MRT | The Duddon valley and Dunnerdale, the southern and outlying fells, Black Combe and the Furness peninsula | dfmrt.org.uk (opens in new tab) |
| Kendal MRT | The south-eastern fells — Kentmere, Longsleddale and the far-eastern moors around Kendal and Windermere | kendalmountainrescue.org.uk (opens in new tab) |
| Penrith MRT | The north-eastern fringe — the Eden valley, lower Ullswater and the edge of the North Pennines | penrithmrt.org.uk (opens in new tab) |
| Kirkby Stephen MSRT | The far east of Cumbria — Mallerstang, the upper Eden valley and the North Pennines (largely outside the core Lakes) | ksmrt.org.uk (opens in new tab) |
Two specialist units support every team across the region: the Lake District Mountain Rescue Search Dogs (opens in new tab), and COMRU (opens in new tab), the Cumbria Ore Mines Rescue Unit, for incidents underground. Every one of these teams is a volunteer-run charity funded by donations — worth remembering next time you pass a collection tin in a Lakeland pub.
12. Lakeland danger spots worth knowing
Some places catch people out disproportionately, and Mountain Rescue reports keep flagging the same pattern: walkers disorientated on broad, featureless ground when the cloud is down and the path underfoot simply disappears. A few to navigate with extra care:
- Helvellyn's summit plateau & east face. Broad and featureless in cloud, with the ground falling away abruptly to the east into Striding Edge, Swirral Edge and the corries. Get your descent bearing right before you leave the trig point. This is the exact terrain where my watch failed me on neighbouring Dollywaggon Pike.
- The Dollywaggon Pike descent to Grisedale Tarn. Steep, rough and disorienting in poor visibility, with rescue incidents on record of walkers becoming cold and disorientated in freezing rain and cloud here.
- Grisedale. A communications black hole — plan to be unable to phone for help once you drop into it.
- Scafell Pike in mist. England's busiest summit and a frequent rescue site. The top is a wilderness of boulders where the path all but vanishes, and several ridges drop away from the plateau — in cloud people lose the line constantly and end up cragfast above the wrong valley.
- The Broad Crag col & boulder field. On the main approach from Great End and Esk Hause, the chaos of blocks between Broad Crag and Scafell Pike has no continuous path to follow and is brutally slow and disorientating in mist — one of the most notorious places in the Lakes to lose the route, especially on the descent. Count your paces and trust your bearing here rather than your feet.
The full graded list
These four are navigation blackspots I single out for how they catch people in poor visibility. For the wider picture, our most hazardous fells list grades every Lakeland summit we've assessed — Extreme, High or Moderate — from published Mountain Rescue incident reports, and grows as we add more. Open a fell's hazard page and read it before you commit to the route.
13. The navigation mistakes I've made
I've written this guide partly because I've got these things wrong myself. Here are three navigation mistakes I've actually made in the Lakes — none of them dramatic, all of them avoidable, and each one a habit I'm still working on.
1. Leaving a good route because I was tired
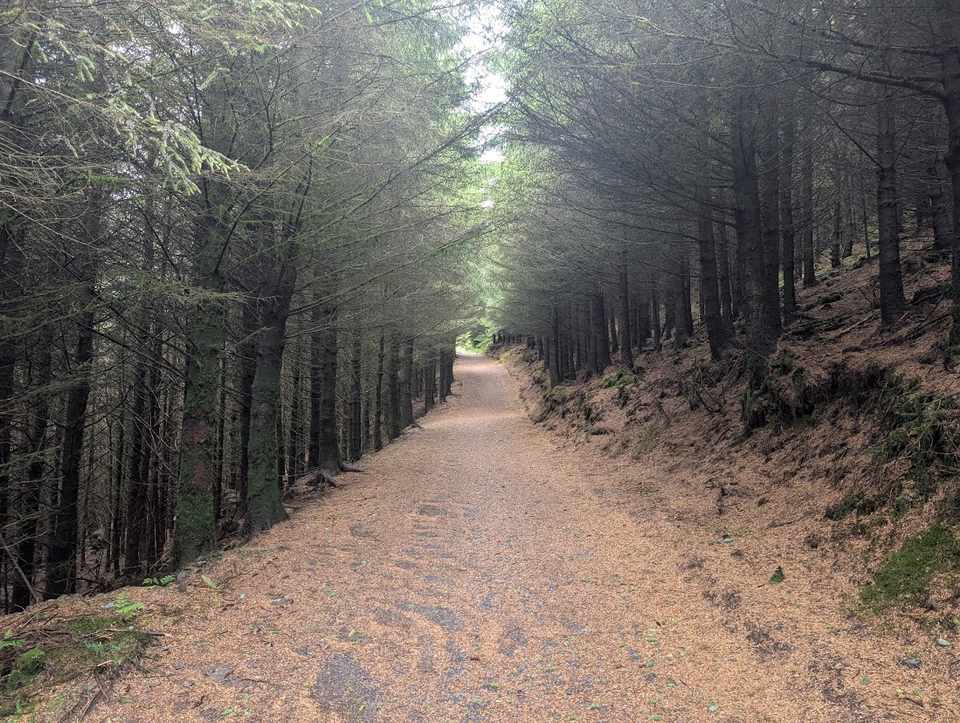
Coming off Dodd (Skiddaw) I'd had enough. I was soaked through, I badly needed the toilet, and a glance at the map on my phone showed what looked like a shortcut through "Long Doors". That tiredness was exactly what made me willing to drop off a clear, planned route and push into an obvious forest plantation, heading for what was plainly a steep drop. I ended up clambering through deep moss, uneven ground and thick trees until the slope fell away too sharply to go on, and I had to turn back. Five minutes saved on paper cost me twenty — and a heap of stress. You can see the whole pointless detour scrawled on my Strava track (opens in new tab). The lesson: when you've got a well-planned route, don't abandon it for a "shortcut" your tired brain likes the look of — least of all when you can already see it's a bad idea.
2. Planning the most direct line, not the sensible one
The second mistake was on the same hike, and it was a planning error — I either didn't think about my own capabilities or quietly over-estimated them. For the ascent of Dodd I'd plotted the direct route up, without checking whether it actually followed a decent, well-walked path. I should have planned it in Garmin Connect with the routing set to "most popular". Instead I used the OS Maps tools, which I've found tend to draw the most direct line — and time after time, out on the hill, that direct line turns out to be unsuitable. So unless you're very confident at plotting and navigating, set your planning tool to "most popular": you're far more likely to get a path that's actually been walked in, and a safe day.
3. Not concentrating — then being too stubborn to turn back
The third one I keep having to relearn: not fully concentrating, and then having too much ego to correct it. On my Ullscarf round, working towards Sergeant's Crag, I clearly missed the track that drops to the lower end of the bluff — and instead of stopping and going back, I kept going. Then I was too determined to give up the height I'd gained, so I committed and ended up climbing the face itself. Once again it cost me far more time than simply turning around would have. Catching a mistake early is free; ego makes it expensive.
14. Frequently asked questions
Do I still need to adjust my compass for magnetic variation in the Lake District?
For practical walking right now, no. As of 2026 the three norths are effectively aligned over Britain, so the grid magnetic angle in the Lakes is under a degree — within the error of a hand-held compass. Learn the technique anyway, because variation will grow again over the coming decade, and always check the figure for your specific location and date.
Which OS map covers Helvellyn and the central fells?
OS Explorer OL5 (The English Lakes, North-Eastern area) at 1:25,000. The Lakes are covered by OL4 (NW), OL5 (NE), OL6 (SW) and OL7 (SE).
Can a GPX route on my watch replace a paper map?
No. Treat the watch as a backup that confirms your position quickly, and the paper map and compass as your primary tool for decisions. Watches drift, lag and die; the map does none of those things.
What's the single most important habit?
Download your offline map and test your apps before you leave signal, and take your descent bearing off the map before you commit to a featureless summit in cloud. Both are kitchen-table decisions that save you on the hill.
Sources & further reading
- Ordnance Survey — "Choosing the Right Map", "Understanding Map Symbols", "Contour Lines", "Grid References", "Features of a Compass", "Taking a Bearing", "Understanding Magnetic North" (OS Get Outside video series).
- Ordnance Survey — The three norths align over Great Britain (opens in new tab); British Geological Survey — Three norths set to leave England (opens in new tab).
- Ordnance Survey Shop — OS Explorer Lake District map set (OL4–OL7) (opens in new tab).
- Lake District Search & Mountain Rescue Association (LDSAMRA) — member teams & team areas (opens in new tab); callout statistics 2024–2025 (Cumbria Crack (opens in new tab); Whitehaven News (opens in new tab)).
- GPS accuracy in mountains and multi-band GNSS — Navigation Professionell (opens in new tab); Garmin Rumors GNSS guide (opens in new tab).
- Apple — Emergency SOS via satellite (UK) (opens in new tab); Garmin — inReach (opens in new tab).
- Naismith's Rule — overview (opens in new tab) and route-timing technique.
- Mountain Weather Information Service (MWIS) and the Lake District Weatherline Fell Top Assessor reports.
This guide combines Ordnance Survey instructional material with the author's own field experience and independently researched, dated facts. Conditions, technology and magnetic variation change over time — always check current forecasts, map editions and device availability before you set out. Navigation is a skill best learned and practised in good conditions before you need it in bad ones.