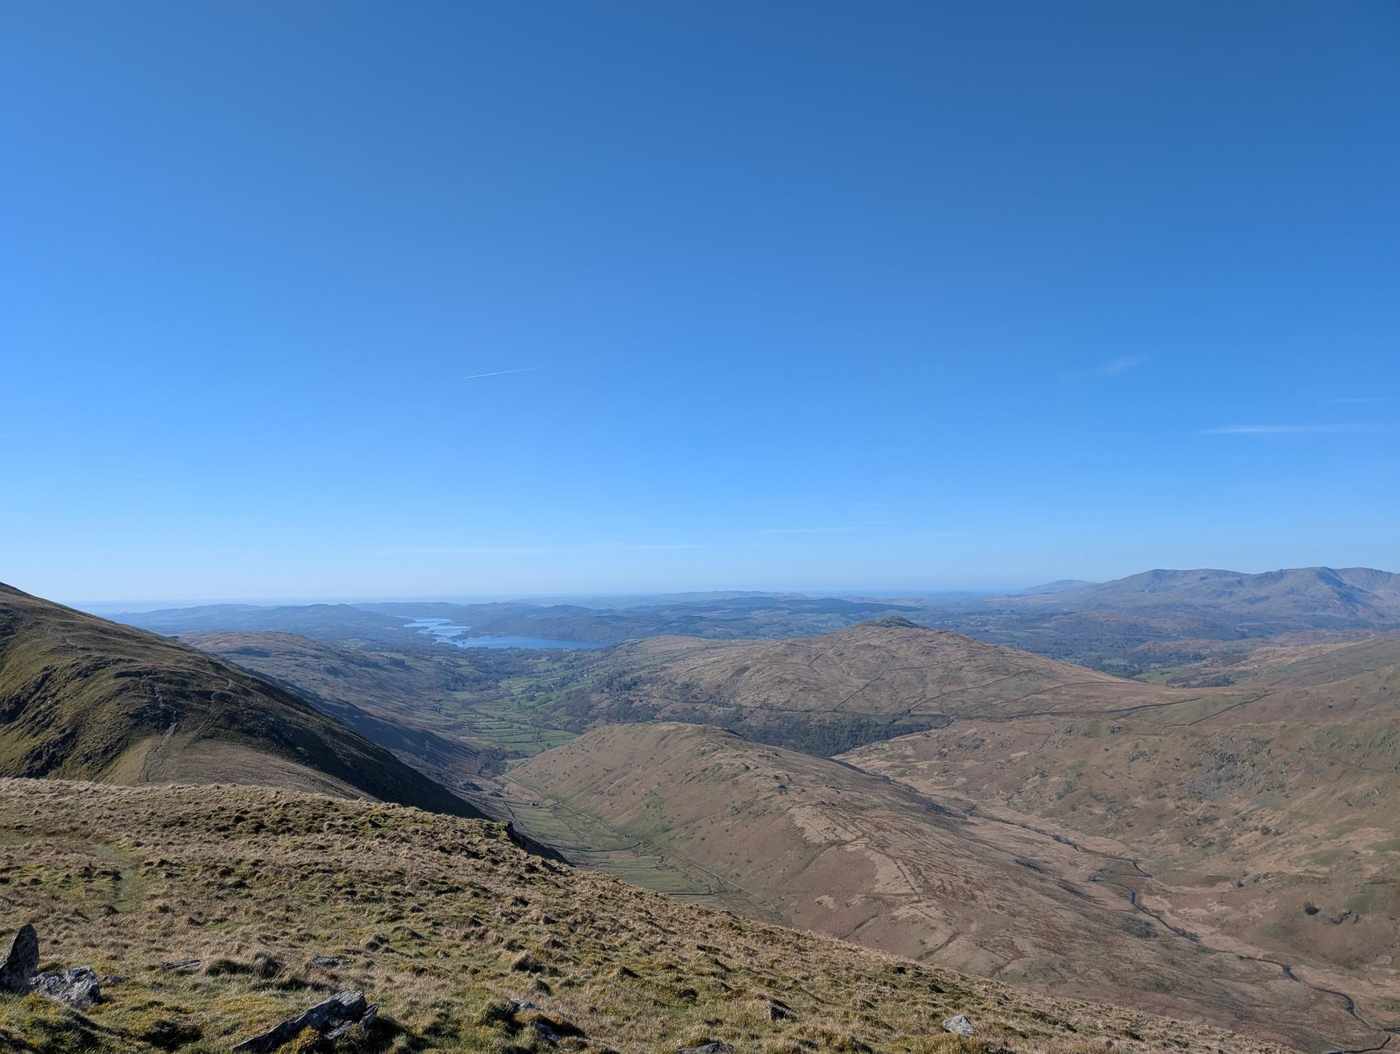
Longsleddale Round (Kentmere Pike, Tarn Crag, Grey Crag & Shipman Knotts)
Photo: © Lee McCoy
Key facts
Difficulty profile
Five independent axes, not one score. “Desk” ratings come from maps and guidebooks, not yet walked — treat them as a guide, not a survey.
Conditions on this route
We score every Lakeland Wainwright each morning on cloud, wind, rain and underfoot, and this route crosses 5 of them. The worst summit governs the verdict — a route is only as kind as its roughest top.
Modelled guidance — not a substitute for the mountain forecast or your own judgement. See how every fell ranks today →
☀️ Daylight & turnaround
Daylight is short from October to February — check today’s sunrise and sunset before you set off, and carry a head-torch and spare batteries. On short days, decide your turn-back time before you start.
Why this matters: 78% of Mountain Rescue call-outs come after midday — the day runs out on the way home, not on the way up. See also walking in bad weather and today’s conditions.
1 Shipman Knotts2 Kentmere Pike3 Harter Fell (Mardale)4 Little Harter Fell5 Tarn Crag (Sleddale)6 Grey Crag (Sleddale Fell)7 Great Howe (Longsleddale)
⚑ escape route
Free mapping: OpenTopoMap / OpenStreetMap (switch layers top-right).
This walk covers about 17.69 km with around 1043 m of ascent, taking in 7 summits. The map above shows the line; the elevation profile and stage notes are below.
Access & barriers
Can a dog, a buggy or dodgy knees manage this route? A quick read from the gates and stiles mapped along the way.
- Dog: A stile of unmapped type — a dog may need lifting over.
- Buggy: Stiles or rough going on the route.
- Knees: A long, steep ~40% drop around the 14.3 km mark — hard on the knees.
On the line: 12 gates · 3 step-over stiles · 5 stiles (type unmapped)
These are mapped barriers, from OpenStreetMap — coverage in the Lakes is good but not guaranteed complete. Spotted a stile or gate we’ve missed? Tell us (opens in new tab) and we’ll fix it. Barrier data as of 2026-07-09. Access data © OpenStreetMap contributors (via Overpass).
Pacing
| Summit | Cumulative | Ascent | Time (fast–steady) |
|---|---|---|---|
| Shipman Knotts | 2.2 km | 313 m | 0:58–1:17 |
| Kentmere Pike | 4.0 km | 465 m | 1:35–2:06 |
| Harter Fell (Mardale) | 5.8 km | 552 m | 2:05–2:46 |
| Little Harter Fell | 7.0 km | 552 m | 2:19–3:05 |
| Tarn Crag (Sleddale) | 10.8 km | 797 m | 3:29–4:38 |
| Grey Crag (Sleddale Fell) | 12.3 km | 848 m | 3:52–5:09 |
| Great Howe (Longsleddale) | 13.6 km | 851 m | 4:08–5:30 |
| Finish | 17.7 km | 1043 m | 5:17–7:01 |
Naismith-based estimate — a fast/steady range. Your pace will vary.
The walk, stage by stage
Sadgill, Longsleddale → Shipman Knotts (2.2 km, 313 m)
Climb of about 313 m over 2.2 km (around 14% average).
Shipman Knotts → Kentmere Pike (1.8 km, 152 m)
Climb of about 152 m over 1.8 km (around 8% average).
Decision point: A simple ridge NE, staying close to the wall over Rough Crags and Goat Scar. The wall becomes continuous near the top — treat it as your handrail in cloud. Cross the stone stile near the summit to the cairn on its knoll; the trig point is a few steps further over the wall.
Easy to get wrong: Wet in patches but the wall keeps you on line. Two early escapes to Hallow Bank (Kentmere side) exist if needed — see the escape notes — both are steep and drop you into the wrong valley for the car.
Kentmere Pike → Harter Fell (Mardale) (1.8 km, 86 m)
Climb of about 86 m over 1.8 km (around 5% average).
Decision point: Return to the fence/wall line and follow it NE, descending gently over Brown Howe (a rise you'll barely notice), then climb beside the fence to Harter Fell's cairn and old iron posts (~778 m). Stay on the east side of the fence where the going is easier.
Easy to get wrong: Soft turf and boggy patches beside the fence. This is the last clean place to cut the round: from here you can drop to Brownhowe Bottom and follow the distinct Gatescarth Beck track back to Sadgill (see escapes).
Harter Fell (Mardale) → Little Harter Fell (1.2 km, 0 m)
Descent of about 115 m over 1.2 km.
Decision point: Take the cairned path NE off the summit towards Gatescarth Pass / Adam Seat, descending rocky-then-grassy ground to the broader shoulder above Gatescarth before the moors.
Easy to get wrong: Rough grass with embedded stones — slippery when wet. Keep to the cairned path, which curves to avoid the steepest drops.
Little Harter Fell → Tarn Crag (Sleddale) (3.8 km, 245 m)
Climb of about 245 m over 3.8 km (around 6% average).
Decision point: Drop NNW on trods to the wet col at the head of the Mosedale–Longsleddale pass. At the gate, do NOT go through — turn left (west) on the faint, mossy track toward Mosedale, drifting W then SW to firmer ground near Mosedale Cottage. Turn NW/N up Tarn Crag's NE ridge; where the path forks, take the LEFT fork to the summit cairn (664 m) — the right fork only leads to the tall survey pillar.
Easy to get wrong: The navigation crux. Mossy, peat-hagged ground where the path dissolves into bog and reappears on hummocks; in mist hold a steady W–SW bearing to Mosedale Cottage. The col onto the NE ridge is a notorious bogfest. The easy mistake is going through the col gate — keep it on your right and turn left.
Tarn Crag (Sleddale) → Grey Crag (Sleddale Fell) (1.5 km, 52 m)
Undulating section of about 1.5 km.
Decision point: Head N from the cairn/pillar onto a path beside a fence descending NW. Cross the next fence by its step-stile and zig-zag down through peat hags to the fence corner just N of Grey Crag. Turn right along the fence across the Greycrag Tarn depression, then climb the grass beyond — bear left up a short grassy gully and left again to the summit cairn.
Easy to get wrong: Peat-hagged moor with no clear trodden line — the fences are your handrails. Greycrag Tarn is a peat-restoration area and is often dry, so don't rely on open water as a marker. Two similar cairns sit ~40 m apart; the main top is the obvious one.
Grey Crag (Sleddale Fell) → Great Howe (Longsleddale) (1.3 km, 3 m)
Descent of about 158 m over 1.3 km.
Decision point: Follow the path NNW from Grey Crag to the fence corner (the Harrop Pike junction). Instead of continuing to Harrop Pike, bear LEFT (SSW) along the fence toward Great Howe, over shallow peat hags, climbing gently to its rocky top and survey column.
Easy to get wrong: Easy to carry straight on to Harrop Pike at the fence corner — bear left for Great Howe. The survey column confirms you're on the right knoll above Sadgill.
Great Howe (Longsleddale) → Finish (4.1 km, 192 m)
Climb of about 192 m over 4.1 km (around 5% average).
Decision point: Descend NW beside the fence to the gate/step-stile into the steep field above Sadgill. Go diagonally down toward the top-left crags you climbed at the start, pick out the same rough gully and descend it carefully through the crag band and bracken, recross the gill, and make for the field-edge gate by the road. Turn left along the short lane to Sadgill Bridge and the parking.
Easy to get wrong: Find the original gully before you drop in — it's the only easy way back through the crags and the bracken hides it. The rock in the gully is greasy when wet; take your time.
Summits bagged (7)
- Shipman Knotts 587 m · Far Eastern · Wainwright, Birkett, Fellranger, Synge
- Kentmere Pike 730 m · Far Eastern · Wainwright, Birkett, Fellranger, Synge, Nuttall
- Harter Fell (Mardale) 779 m · Far Eastern · Wainwright, Birkett, Fellranger, Synge, Nuttall, HuMP
- Little Harter Fell 681 m · Far Eastern · Birkett
- Tarn Crag (Sleddale) 664 m · Far Eastern · Wainwright, Birkett, Fellranger, Synge, Nuttall, Marilyn
- Grey Crag (Sleddale Fell) 638 m · Far Eastern · Wainwright, Birkett, Fellranger, Synge, Nuttall
- Great Howe (Longsleddale) 494 m · Far Eastern · Birkett
🅿️ Getting there & parking
Positions are approximate. Lakeland car parks fill before 9am on fine weekends.
💧 No mapped drinking water or shelter on this route — that doesn’t mean there is none, and never drink untreated from a beck. (Facilities data © OpenStreetMap contributors.)
🚌 Buses
No regular bus serves the start — this is one for the car. Nearest hubs: Penrith (X4/X5 & 508), Ambleside and Windermere (555, 505, 516).
Rural routes change seasonally — confirm on stagecoachbus.com (opens in new tab) or Traveline before travelling.
⚠️ Safety & conditions
- Boggy ground: the Sleddale moors (Tarn Crag, Grey Crag and the Mosedale–Longsleddale pass) are peat-hagged and frequently very wet — expect bog and use the wall/fence lines as handrails.
- Faint paths + serious navigation: trods are indistinct across Cocklaw Fell and the Sleddale plateau. Best saved for good visibility — avoid the Tarn Crag/Grey Crag moors in thick hill fog.
- A long, quiet day: roughly 10–12 miles and over 3,000 ft of ascent, with far fewer people than the Kentmere side — be self-reliant.
Check live conditions in the “From the fells” panel, on MWIS (opens in new tab) and the Met Office mountain forecast (opens in new tab) before you set off.
⚡ Escape routes
- At about 2.6 km: descend to Hallow Bank (Kentmere) (cuts ~15.0 km) — Emergency escape only: from the Shipman Knotts–Kentmere ridge a steep descent left (slightly behind you) drops to Hallow Bank — but that's the Kentmere side, not back to Sadgill, so you'd face a valley walk round to the car.
- At about 3.1 km: descend to Hallow Bank, below Goat Scar (cuts ~14.0 km) — About half-way up Kentmere Pike a sharp left doubles back below Goat Scar down to Hallow Bank — steep, and again on the Kentmere side rather than Sadgill.
- At about 5.8 km: descend to Sadgill via Gatescarth Beck (cuts ~7.0 km) — The clean cut before the Sleddale moors: from Harter Fell drop to Brownhowe Bottom and follow the distinct track through Settle Earth and along Gatescarth Beck to Sadgill, then the wood, Stile End and High Lane back to the start.
Bail-out lines verified on the ground. In poor visibility a marked descent can be safer than retracing a ridge.
Make it easier or harder
Easier: Shorten by cutting back to Sadgill from Harter Fell down Gatescarth Beck (Brownhowe Bottom), which skips the long, wet Sleddale moorland leg; the two Hallow Bank descents off the Kentmere ridge are steep emergency escapes only (they land in Kentmere, not at the car).
Harder: Add Harrop Pike from the fence corner between Grey Crag and Great Howe for the full Sleddale circuit.
Why this direction: Walked anticlockwise from Sadgill — up the firm Kentmere ridge (Shipman Knotts, Kentmere Pike, Harter Fell) first while fresh, leaving the pathless, boggy Sleddale moors (Tarn Crag, Grey Crag, Great Howe) for the return.
Short version: turn back at about 8.7 km (drop to Sadgill, Longsleddale) — roughly half the distance.
📚 Maps & guidebooks for Longsleddale Round (Kentmere Pike, Tarn Crag, Grey Crag & Shipman Knotts)
- Buy on Amazon (opens in new tab)
- Buy on Amazon (opens in new tab)
- Buy on Amazon (opens in new tab)
- Buy on Amazon (opens in new tab)
- Buy on Amazon (opens in new tab)
- Buy on Amazon (opens in new tab)
As an Amazon Associate we earn from qualifying purchases — at no extra cost to you. How affiliate links work →