How to Start Hiking: A Beginner's Guide to the Lake District Fells
A field-tested beginner's guide to hill-walking in the Lake District — what to do, what to carry, what it really costs, and the mistakes I made so you don't have to.
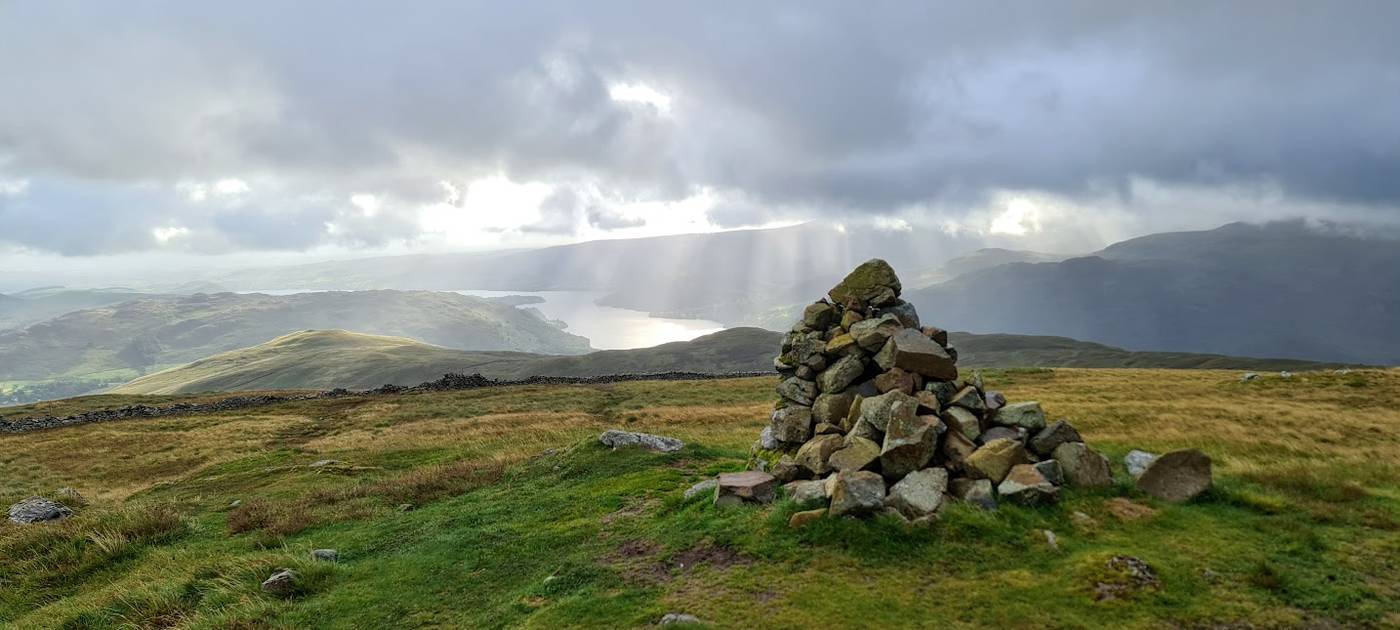
When you first get the hiking bug it's easy to assume everyone else was born knowing which routes to pick, what to wear, and how to read the sky above a fell. It wasn't like that for me. Over the years I've made expensive, occasionally miserable, and once or twice genuinely dangerous mistakes on these hills — and almost all of them were avoidable. The good news is that they're far better learned cheaply, on an easy walk, than the hard way on a serious mountain.
This guide is for anyone who wants to start hill-walking, or who's started but still feels like they're figuring out the rules. The aim is simple: start small, build real skills and judgement, and grow into the big fells when you're genuinely ready — not before. And, because the kit industry would have you believe otherwise: you do not need to spend a fortune to begin.
The five habits that matter most
- Start early and set a turn-back time — most trouble happens late in the day, on the way down.
- Treat your waterproof shell as safety kit, not comfort — and check it's actually waterproof, not just showerproof.
- Carry a paper map and compass, and learn to use them — your phone is the backup, never the only tool.
- Check a mountain-specific forecast the night before and on the morning — the valley forecast won't do.
- Tell someone your route and back time, and agree what they do if they don't hear from you.
1. Why the basics matter — the honest numbers
It's tempting to treat mountain-safety advice as scaremongering. The figures say otherwise.
In 2024, mountain rescue teams in England and Wales were called out 3,842 times — and for the first time ever, on every single day of the year. Nearly four in five of those call-outs (78%) came after midday, as people ran out of daylight, energy or weather on the way down — which is the single best argument there is for an early start and a firm turn-back time (Mountain Rescue England & Wales, Annual Review 2024 (opens in new tab); see also the British Mountaineering Council (opens in new tab)).
Here in the Lake District it was a record year too. According to the Lake District Search & Mountain Rescue Association (LDSAMRA), the area's teams passed 800 call-outs, and deaths more than doubled — 32 in 2024 against 14 the year before, with cardiac arrest the single biggest cause (reported by Cumbria Crack (opens in new tab)). And the fastest-growing group needing help isn't who you'd picture: 18–24-year-olds are now the most-rescued age group in England and Wales — a rise mountain-rescue leaders link to social-media honeypots and over-trust in phone navigation apps (Ordnance Survey / MREW (opens in new tab); The Guardian (opens in new tab)).
The pattern rescuers describe again and again is the same: inadequate preparation, poor gear choices, or leaning on a phone instead of real skills. Every one of those is something you can sort before you leave the house — which is exactly what the rest of this guide is about.
2. What it really costs to start (and what it doesn't)
The outdoor industry is very good at making you feel you need a head-to-toe technical wardrobe before you're allowed on a path. You don't. For easy and moderate walks in reasonable conditions, you can start with sensible clothes you already own plus a small handful of upgrades.
The trick is knowing where a failure actually hurts — and only spending there. As a rough sense of scale: buying the three real priorities new — a proper waterproof, footwear with grip, and a map and compass — might run somewhere around £150–£300 depending on the brands you choose, and considerably less if you buy pre-loved. Everything else you can add slowly. (Prices are indicative and reviewed annually.)
Worth spending on
This is where bad kit gets dangerous or miserable:
- A genuinely waterproof, breathable shell. Not "showerproof" — waterproof. This is the one I learned the hard way (below), and it's the piece I now treat as safety equipment.
- Footwear with real grip, matched to the wet, rocky ground you'll actually meet here.
- A way to navigate — and the skill to use it. A paper OS map and compass cost very little and never run out of battery.
Start with what you own
- Base layers: any synthetic or merino top — running, gym or cycling kit is perfect. (Just never cotton: it holds water and chills you.)
- A fleece or light insulated jacket you've already got.
- Walking trousers — anything comfortable and quick-drying; avoid jeans, which are heavy when wet and dry painfully slowly.
- A daypack you own, a water bottle, a phone.
Buy second-hand without a second thought: fleeces, mid-layers, waterproof over-trousers, rucksacks and trekking poles are all fine pre-loved — eBay, Vinted, club gear-swaps and the charity shops in Lakeland towns are full of barely-used kit. Even a hard-shell jacket can be a bargain if the seams and zips are sound.
Don't skimp, and don't buy blind: boots above all — fit and wear are personal, so ideally try your own pair on and break them in. Anything genuinely safety-critical you can't inspect (a scrambling helmet, a worn-out shell) is a false economy.
Free or near-free: a paper OS Explorer sheet is around a tenner and lasts for years; libraries sometimes lend maps and guidebooks; YouTube route "recces" cost nothing and show you the real ground; and the fells themselves, of course, are free. You can add the rest gradually, a piece at a time, as you work out what you actually use.
The honest version: a waterproof, a decent pair of boots, a map and compass, and a rucksack of bits you mostly already own will get you safely up a great many Lakeland fells. Everything beyond that is comfort and convenience — buy it slowly, when you know you'll use it.
3. Start small: easy, rewarding routes first
The biggest early win in hiking isn't bagging Helvellyn — it's discovering you genuinely enjoy being out there, and wanting to go again next weekend. For that, easy and moderate routes are your friend: well-defined paths, lower fells, lakeshore loops, short pulls to a big view rather than long, committing ridge days. They still feel like real hiking — fresh air, big views, honest effort — with far less exposure, navigation and consequence if something goes wrong.
- Gentle routes that make ideal first outings: Easy & family walks
- Short walks with an outsized payoff: The best viewpoints
Treat your first few days as practice runs. The job isn't to prove anything; it's to get comfortable on uneven ground, find your pace, see how your kit copes for real, and start building the habits that keep you safe on harder days later. The famous fells will still be there — and you'll enjoy them far more arriving with some miles in your legs and a bit of hard-won judgement in your head.
4. Plan the day properly
Good days on the hill are mostly made at home the night before. A simple routine heads off most avoidable trouble.
Estimate your time — Naismith's Rule. The classic rule of thumb, and the same one we use in the navigation guide: allow 15 minutes per kilometre on the flat, plus 10 minutes for every 100 m of ascent. (That's a realistic ~4 km/h — deliberately more cautious than Naismith's original 5 km/h, because most of us, and certainly most beginners on Lakeland ground, are slower.) So a 10 km walk with 400 m of climb is roughly 150 + 40 = about 3¼ hours (190 minutes) of moving time — before breaks, photos, navigation and rough going. As a beginner, add a generous buffer on top.
A five-minute pre-walk checklist
- Pick a route that honestly matches your fitness, experience and the day's forecast.
- Work out the time with Naismith, then add 20–30 minutes.
- Set a turn-back time: if you're not at point X by time Y, you head back — however good you feel.
- Note any escape routes to cut the day short.
- Save and print the route and map — don't rely on one device.
- Check the forecast one last time on the morning itself.
Tell someone where you're going. It's the simplest, most important habit in hill-walking: tell a friend or family member where you're going, who with, and when you'll be back — and agree what they should do, and when, if they don't hear from you. Give them your start grid reference and intended route. Most incidents that turn serious do so partly because no one knew where to start looking.
5. Gear: where to spend, where to save
This covers what you realistically need for easy-to-moderate day walks — not a mountaineering list. A useful framework is the long-established "ten essentials": navigation, sun protection, insulation, light, first aid, a means of emergency warmth, repair/tools, food, water and shelter. For simple UK days, a beginner version of that is entirely doable on a budget.
Clothing: warm and dry
A waterproof shell is non-negotiable. There's a real difference between "showerproof" (fine for drizzle) and "waterproof" (built for the sustained wind and rain you'll actually meet on a fell). Look for both a waterproof rating (around 10,000 mm and up for hill use) and breathability, so your sweat can escape while the rain stays out.
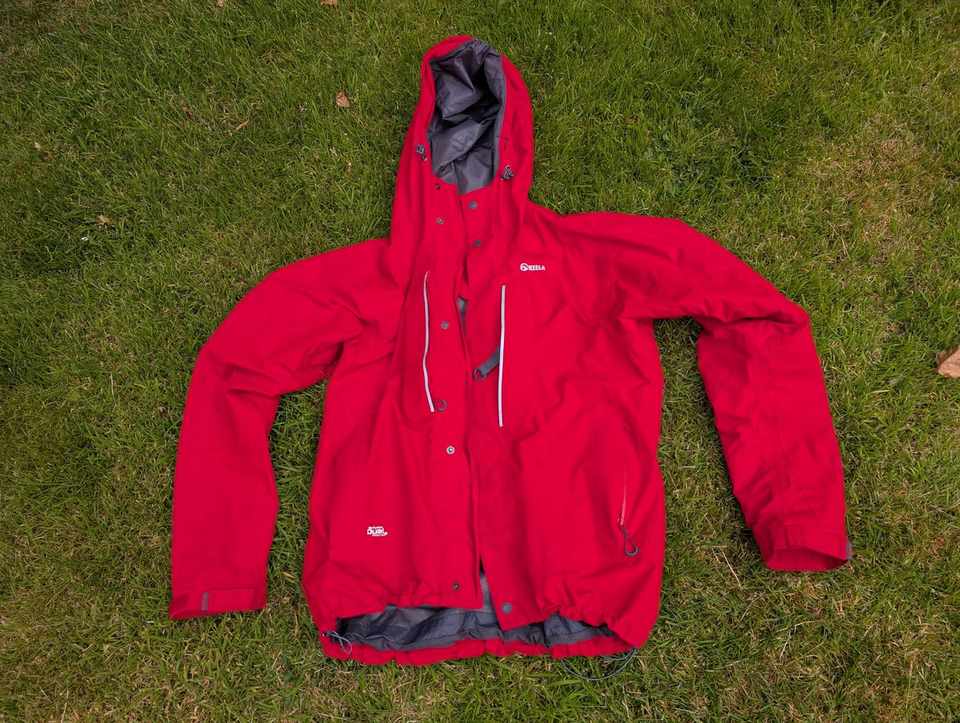
From experience — my Helvellyn shell
I went up Helvellyn in a Rab Firewall Light — a lovely lightweight jacket, but the wrong tool for that day's sustained wind and driving rain. It couldn't move the sweat fast enough and couldn't keep the weather out, and I finished soaked from both directions and genuinely cold. The jacket wasn't faulty; I'd brought a light shell to a full-on mountain day. Since then I treat my outer layer as safety kit, not just comfort — I check the waterproof and breathability ratings, and I watch long-form reviews filmed in actual bad weather before I buy.
Layer it. Base layer to wick sweat, mid-layer (fleece or light synthetic) for warmth, waterproof shell over the top — so you can adapt as you heat up on the climb and cool down at stops or on the descent. Add comfortable walking trousers (not denim), waterproof over-trousers if rain's likely, and a hat and gloves in cooler or shoulder-season weather — even a low fell in a wind can catch you out.
From experience — dress to be found
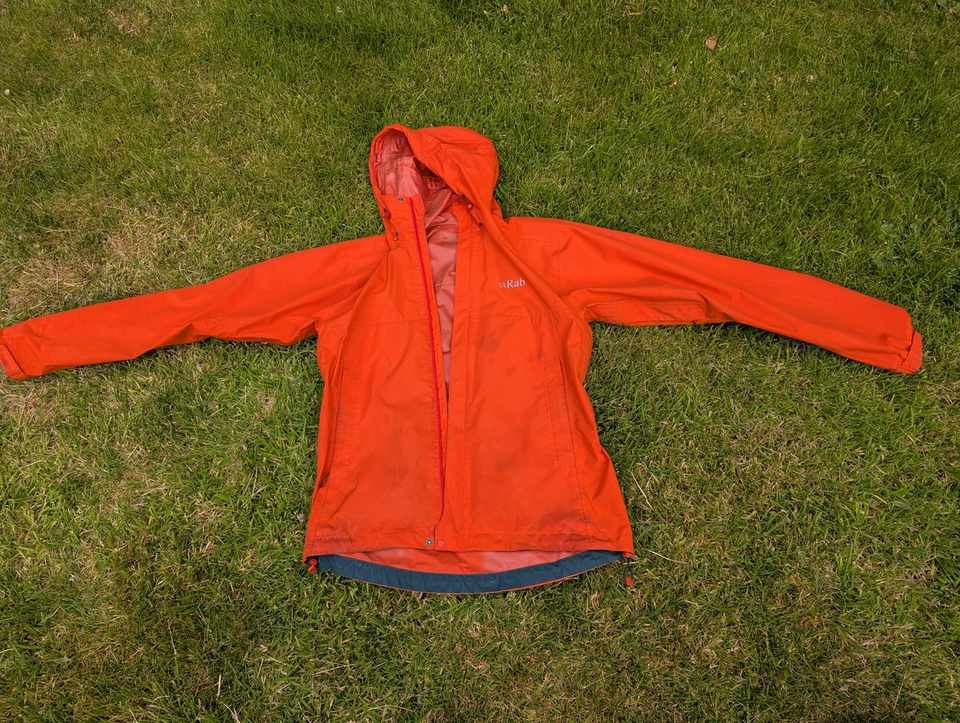
When I buy a shell or a fleece, I deliberately pick a bright, saturated colour — orange or red especially. It costs nothing extra, and on the one day it matters it makes a real difference: a walker in vivid orange is far easier for a rescue team, a helicopter crew or even a passing party to pick out against grey rock, brown bracken or low cloud than someone in black, navy or khaki. Earth tones look smart in the car park; a bright outer layer is what gets you spotted on the hill. Keep something high-visibility on the outside, and back it up with a whistle and a foil blanket in the pack.
Footwear: grip and the ground underfoot
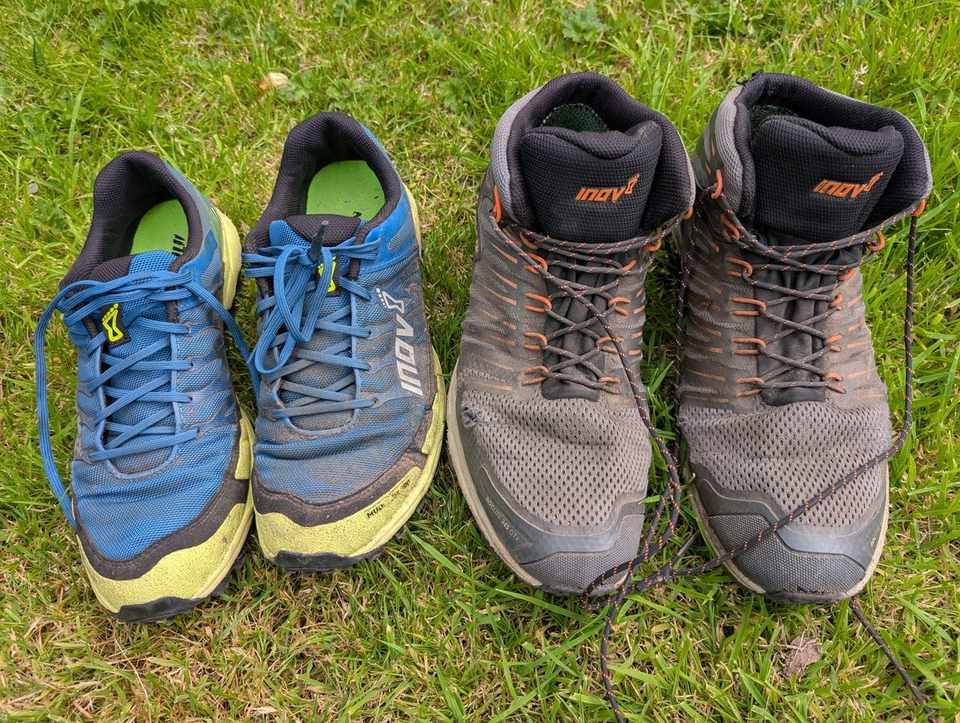
Your footwear matters more than most beginners expect, and the right answer depends on the terrain. Sturdy boots or shoes with good grip and support are the safest starting point — they don't need to be expensive, but they do need to be comfortable, broken in, and suited to the ground.
From experience — the trail-runner trap
I bought a pair of trail runners that were brilliant in mud — and close to useless on the wet rock and damp stone steps you meet constantly in the Lakes. Many trail runners are tuned to grip while you're running, where each stride loads the sole hard; at a slow walking pace on greasy rock the physics change and the grip can vanish. I got away with it because the route was easy. The lesson: match footwear to the actual surface — wet-rock grip and mud grip are different things — and read independent, in-depth reviews that test the sole on wet rock specifically, not the product page.
Navigation: more than a phone
For easy and moderate walks navigation needn't be complicated, but it does need to be real: a paper OS 1:25,000 (Explorer) map, a compass, and a phone with offline maps as a backup — not your only tool. Rescue teams deal constantly with walkers whose phone died, lost signal, or whose app simply lacked the detail. Knowing how to use a map and compass matters far more than owning the priciest GPS — and it's cheap. If you're new to it, practise on easy routes in good visibility before you need it in cloud: the Lake District navigation guide.
First aid
A small, well-chosen first-aid kit earns its weight: blister plasters (blisters ruin days out of all proportion), a wound dressing, painkillers you can take, any personal medication, a whistle (six blasts is the distress signal), and a lightweight foil blanket. Carry it — and know how to use it: first aid for the fells.
What to pack in a daypack
| Item | Notes |
|---|---|
| Water (1–2 litres) | More in heat; plus a plain spare bottle — see below |
| Food + extra snacks | More than you think you need |
| Spare warm layer | Fleece or light insulated jacket |
| Waterproofs | If not already worn |
| Head-torch + spare batteries | Even if you plan to be home by dark |
| Map & compass | In a dry-bag or map case |
| Phone + small power bank | In a dry-bag |
| First-aid kit | Pre-packed, accessible |
| Sun cream + lip balm | UV is strong on open fells and snow |
| Optional | Trekking poles (kind on the knees descending); printed route |
From experience — water, twice over
First: I tried various hydration salts in my bladder and found some brands gave me real digestive grief on the hill — so test any new food or electrolyte product on a short walk near home first, never on a big day. Second: on Helm Crag at about −3 °C, the drinking tube of my bladder froze solid, cutting off my main water. The plain bottle buried in my pack was fine — that one small redundancy saved the day. Always carry at least one plain water bottle, whatever else you're using.
6. Weather: respect the hills
Even on "easy" routes the weather can turn a pleasant walk into a serious one — and a lot of those record call-outs were ordinary walkers on well-known paths, caught out by conditions they weren't ready for. Weather on the tops behaves nothing like the valley: the cloud base can sit hundreds of metres lower than it looks from the car park, wind strengthens sharply with height, and wind-chill can drag the felt temperature well below the forecast number.
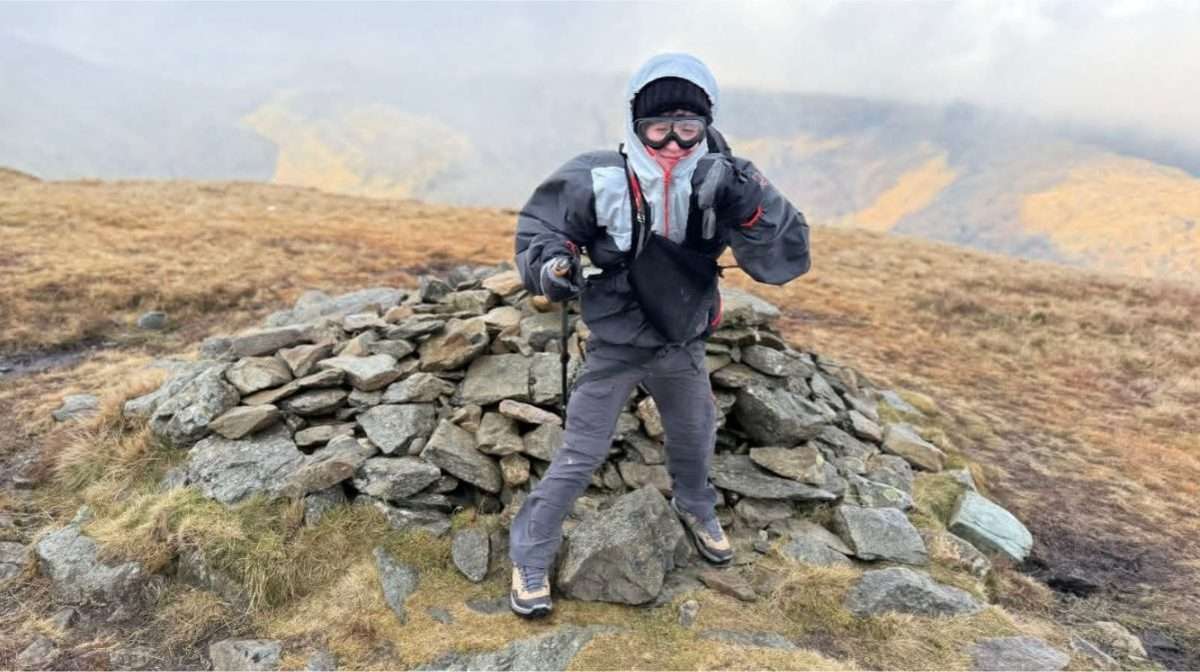
Before you go, check a mountain-specific forecast, not the valley one — ideally two:
- The Met Office Mountain Weather Forecast (opens in new tab) (wind, wind-chill, cloud base, visibility).
- The Mountain Weather Information Service (MWIS) (opens in new tab), written for walkers across UK upland regions.
Build these habits from day one: read wind speed and wind-chill, not just the rain icon; note the cloud base (below your summit means you'll be navigating in cloud); plan with a "what if it's worse than forecast?" mindset and a lower-level alternative ready; and check again on the morning — upland forecasts are least reliable exactly when conditions are turning. More on this: conditions & best-day planning.
7. Walk with others when you can
Going out with at least one other person makes a real difference when you're starting. In Scotland in 2024, an ankle injury was the single most common problem mountain rescue dealt with — and an ankle that's merely a hobble back to the car with a companion can become a stay-put-and-send-for-help situation alone (Scottish Mountain Rescue, Annual Review 2024 (opens in new tab)). Beyond safety, you share the navigation, the decisions and the experience — and it's simply better company.
That's how I started. For a long time I only went up the bigger mountains in company — learning the ropes from people with more experience — long before I was confident enough to head out on my own. There's no shame in it; it's the sensible order to do things in.
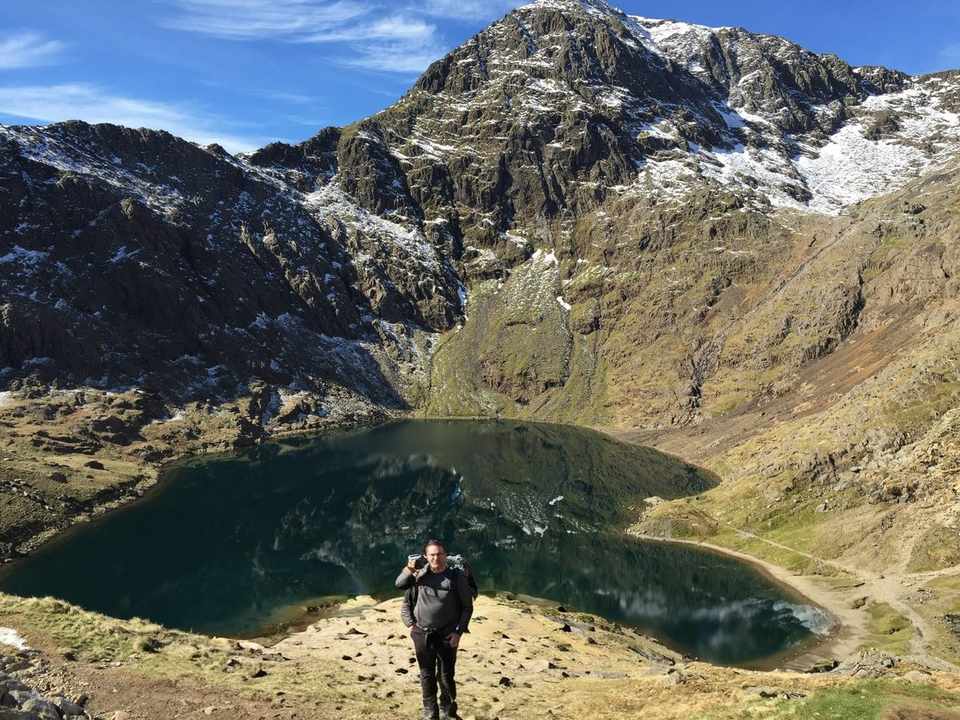
A few group habits worth agreeing before you set off: walk at the pace of the slowest member; stay in sight of each other in poor visibility; make any decision to change route or turn back together, never leaving it to one person; and keep an eye on each other at cold, windy summits and rest stops.
8. Building up to the bigger fells
There's something genuinely memorable about a big summit earned through preparation and accumulated skill — Helvellyn, Scafell Pike, Blencathra are wonderful days. They're also days where poor preparation has contributed to serious incidents. The progression that makes them a joy rather than an ordeal:
- Several easy and moderate walks, in a range of conditions.
- Basic navigation practised on simple ground in good visibility.
- A packing routine that works, and gear you trust.
- A real sense of your own pace and how your body handles hills, heat, cold and a long day.
- Experience of genuinely mixed weather — so you know what "conditions deteriorating" actually feels like.
There's no fixed timetable. Some people are ready for the big fells after a handful of outings; others build over a season or two. Both are fine. The only wrong move is skipping the foundation entirely.
9. My five biggest mistakes, in one place
If you skim nothing else, skim this recap — it's everything above, learned the hard way:
- Brought a light shell (Rab Firewall Light) to a full mountain day on Helvellyn. Match the jacket to the conditions; treat your shell as safety kit, not comfort.
- Trusted an auto-generated route planner that sent me on an awkward, ill-defined line. Use digital tools to understand a route, then sanity-check it against where experienced walkers actually go — and the routes here.
- Wore trail runners that were lethal on wet rock. Match footwear to the surface; wet-rock grip ≠ mud grip.
- Used new hydration salts on a big walk and paid for it. Test anything new close to home first.
- Let my bladder tube freeze on Helm Crag at −3 °C. Always carry a plain spare bottle.
None were catastrophic. All were avoidable — and all were cheaper lessons on an easy day than they'd have been on a serious one.
10. FAQ
How much does it cost to start hiking in the UK?
Far less than the shops suggest. If you already own synthetic base layers, a fleece and a rucksack, your real outlay is a proper waterproof, footwear with grip, and a paper map and compass — roughly £150–£300 bought new, and plenty of that can be bought second-hand for much less. You can start safely for well under the price of one "premium" branded jacket.
Do I need walking boots, or are trainers/trail runners OK?
For easy, dry, low-level paths, sturdy trainers can be fine. For typical Lakeland ground — wet rock, uneven stone, bog — boots or shoes with grip and support are safer, and trail runners that excel in mud can be alarming on wet rock. Match the footwear to the surface, not the label.
How fit do I need to be to start?
Fit enough for a brisk few hours on uneven ground — start with short, easy routes and build up. Use Naismith's Rule (15 min/km + 10 min per 100 m of climb) to pick days that match where you honestly are now.
What's the single most important piece of kit?
A genuinely waterproof, breathable shell — and, just behind it, a map and compass and the skill to use them. Both are cheap relative to how much trouble they save.
Is it safe to hike alone as a beginner?
It can be, on easy, popular routes in good conditions — but it raises the stakes if something goes wrong. Going with someone is safer and more fun while you build judgement. If you do go solo, always tell someone your route and back time.
Do I really need a map and compass if I've got a phone?
Yes. Phones die, lose signal and freeze, and apps can lack detail. Carry the phone with offline maps as a backup, and keep a paper map and compass as your primary tools — see the navigation guide.
What's a good first fell in the Lake District?
Short, rewarding viewpoints and low fells — the kind collected on the easy walks and viewpoints pages — rather than the big honeypot summits. Get the miles and the judgement first.
Where to go next
- A gentle first route → Easy & family walks
- A rewarding viewpoint → The best viewpoints
- Map & compass basics → Navigation guide
- A simple first-aid kit & know-how → First aid for the fells
- Weather & conditions → Conditions
- Routes I've planned → All routes
Sources & further reading
- Mountain Rescue England & Wales — Annual Review 2024 (opens in new tab) (3,842 call-outs; a call-out every day of the year; 78% after midday); British Mountaineering Council — the demanding situation for MR teams (opens in new tab).
- Ordnance Survey / MREW — 18–24s now the most-rescued age group (opens in new tab); The Guardian — social media & map apps and the record rise in call-outs (opens in new tab).
- Lake District Search & Mountain Rescue Association (LDSAMRA), reported by Cumbria Crack — Lake District deaths double in a year (opens in new tab) (2024: 32 deaths vs 14; cardiac arrest the top cause).
- Scottish Mountain Rescue — Annual Statistics Review 2024 (opens in new tab) (ankle injuries the commonest problem).
- Met Office — Mountain Weather Forecast (opens in new tab); Mountain Weather Information Service — mwis.org.uk (opens in new tab).
- Naismith's Rule — standard hill-walking time estimate, aligned to our navigation guide.
This guide combines the author's own field experience with independently researched, dated facts. Safety statistics reflect the most recent published figures at the time of review and will age — always check current forecasts and guidance before you set out. Hill-walking carries real risk; nothing here is a substitute for your own judgement or for proper mountain-specific training.