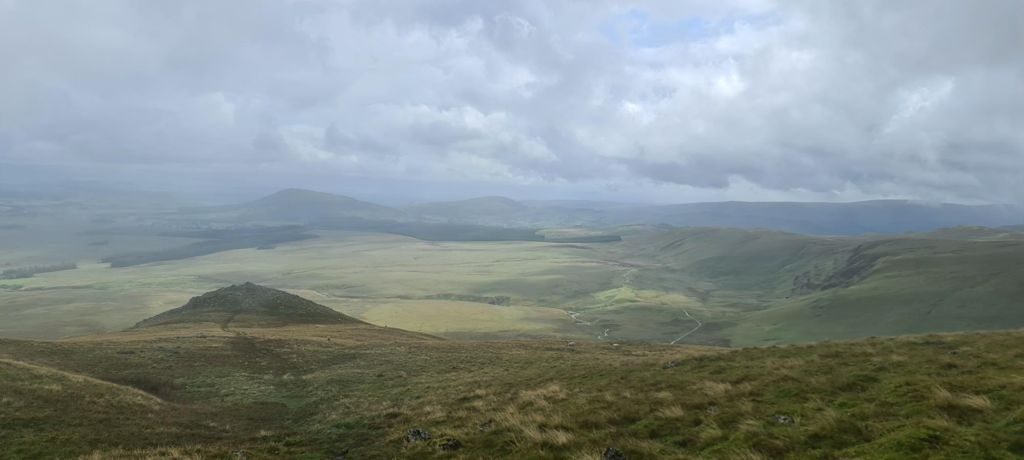
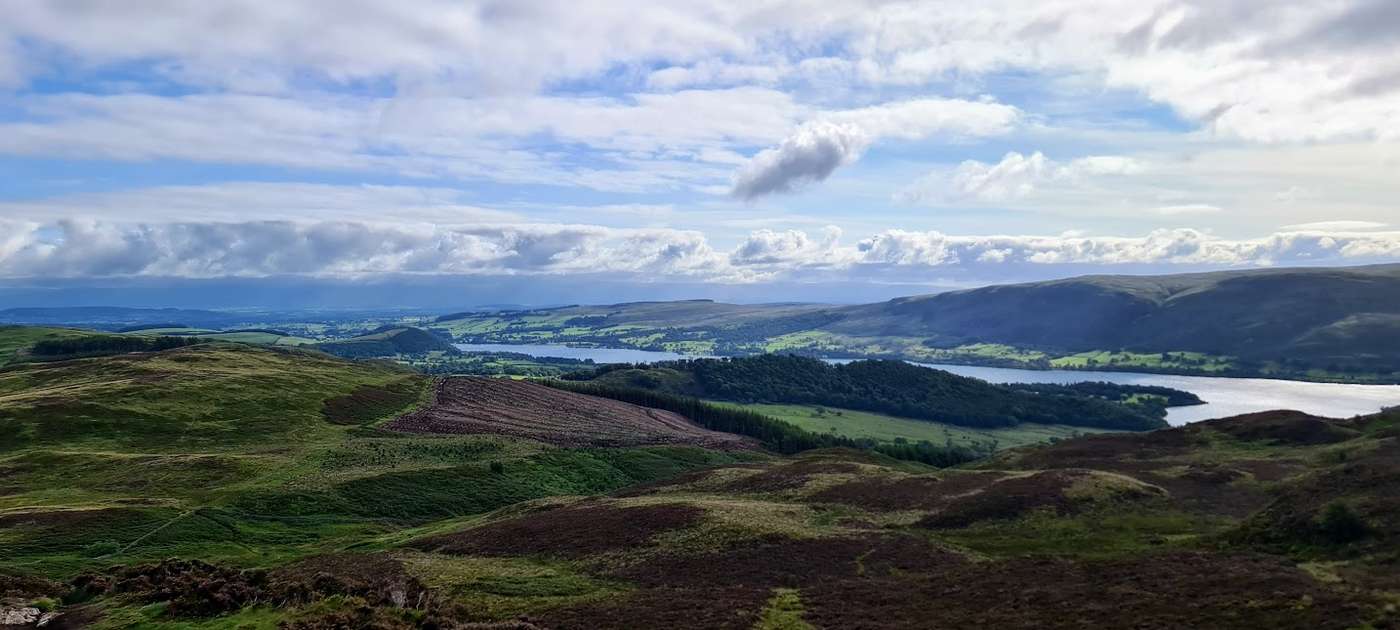
Ten Birkett tops strung along the Dodds above Ullswater, from Low How and Randerside over Great Dodd and Stybarrow Dodd — 16.4 km and 694 m across eleven stages. Rated hard to navigate and easy for exposure; about 4.4 hours.
✎️ Planned route — drawn but not personally walked or checked yet. A planned line is a suggestion, not a guarantee — conditions change. Navigate independently and carry a map & compass. How to use this guide.
Difficulty profile
LengthHard16.45 km — a long day out.
SteepnessModerateSteepest sustained pull about 23% around the 16.4 km mark.
TerrainModerateMostly good mountain path. desk assessment — not field-verified
NavigationHardCare needed in cloud — ~20% featureless high ground. desk assessment — not field-verified
ExposureNot assessedExposure (drops, scrambling, how bad a slip would be) can’t be judged from gradient data alone, so we don’t guess. A rating appears once the route is editorially assessed or walked.
Five independent axes, not one score. “Desk” ratings come from maps and guidebooks, not yet walked — treat them as a guide, not a survey.
Conditions on this route
We score every Lakeland Wainwright each morning on cloud, wind, rain and underfoot, and this route crosses 3 of them. The worst summit governs the verdict — a route is only as kind as its roughest top.
Daylight is short from October to February — check today’s sunrise and sunset before you set off, and carry a head-torch and spare batteries. On short days, decide your turn-back time before you start.
This walk covers about 16.45 km with around 694 m of ascent, taking in 10 summits. The map above shows the line; the elevation profile and stage notes are below.
Access & barriers
Can a dog, a buggy or dodgy knees manage this route? A quick read from the gates and stiles mapped along the way.
Dog
Gates only
Buggy
Not buggy-able
Knees
Steep in places
Dog: Gates and kissing gates only — a dog can do the whole route.
Buggy: Stiles or rough going on the route.
Knees: A sustained ~21% descent around the 12.0 km mark — a little jarring on tired knees.
Naismith-based estimate — a fast/steady range. Your pace will vary. These use Naismith’s textbook constants (5 km/h, 600 m of ascent an hour). Measured against a pace fitted to 41 recorded Lakeland walks they run about 8% slow, and we have left them that way deliberately: a slow estimate strands nobody.
The walk, stage by stage
1
Start → Low How (3.4 km, 202 m)
Climb of about 202 m over 3.4 km (around 6% average).
Leave the valley floor above Ullswater and begin a steady, drawn-out traverse up the lower intake walls and grassy flanks to reach the minor elevation of Low How. The ascent utilizes a network of faint agricultural tracks and sheep trods that weave a path of least resistance through the rolling, bracken-covered lower slopes
Waypoints
Valley approach, lower intake walls, Low How summit
Decision point
Utilize the stone boundary walls and sheepfold ruins on the lower fellside as a reliable guide to gain elevation; once above the bracken line, simply follow the upward trajectory of the grassy spur
Easy to get wrong
In the summer months, these lower eastern flanks are notoriously choked with waist-high bracken, which obscures the ground and hides deep, ankle-twisting runnels. The faint grassy paths can also become slick clay chutes after heavy Lake District rain, requiring sturdy boots with deep lugs even on this moderate gradient
If you need to get off
If the initial ascent is too taxing, simply turn around and follow the grassy slopes straight back down to the sheltered valley road; do not contour sideways into the steeper gills that dissect the hillside
2
Low How → High Brow (0.7 km, 86 m)
Climb of about 86 m over 0.7 km (around 12% average).
Push straight up the increasingly steep, grassy incline, leaving the rolling lower slopes behind to tackle the sharp, direct pull up the spine of the ridge to High Brow. The terrain shifts from agricultural pasture to true open fell, with the path cutting directly into the slope
Waypoints
Low How, steep grassy spur, High Brow summit
Decision point
The topographical shape of the ridge acts as a natural handrail; you merely need to follow the crest of the spur straight up to the high point of High Brow
Easy to get wrong
This is a short but lung-busting pitch where the gradient jumps significantly to 12%. The wet grass offers minimal purchase, meaning your calves will take the brunt of the work, and a slip here results in a frustrating slide back down the hill
If you need to get off
The safest and only sensible retreat is to reverse your line of ascent straight back down the grassy spur to Low How; bailing off the sides of this spur will dump you into rough, trackless ravines
3
High Brow → Randerside (2.1 km, 169 m)
Climb of about 169 m over 2.1 km (around 8% average).
Continue the upward trajectory along the broad, sweeping grassy ridge line, covering a fair distance of rolling upland moorland to reach the distinct bump of Randerside. The gradient eases slightly compared to the previous stage, allowing for a steady, striding pace across the expansive, exposed fell
Waypoints
High Brow, upland moorland traverse, Randerside summit
Decision point
Faint grassy trods weave across the moorland, but in thick clag, maintaining a steady south-westerly compass bearing is essential to stay central on the broad ridge and hit the rise of Randerside
Easy to get wrong
You are now heavily exposed to prevailing weather systems blowing across the Helvellyn massif. The broad depressions on this section hold spongy, boot-soaking peat bogs, and finding a dry line requires constant micro-navigation to weave around the worst of the waterlogged tussocks
If you need to get off
If weather conditions deteriorate rapidly on the exposed moor, turn east to drop steadily off the broad ridge, utilizing the gentle grassy slopes to descend safely toward the Matterdale valley system
4
Randerside → Great Dodd (0.9 km, 142 m)
Climb of about 142 m over 0.9 km (around 16% average).
Dig in for a brutally steep, concentrated ascent up the final eastern flank of the main Helvellyn range, pushing hard to crest the massive, domed plateau of Great Dodd. The path climbs relentlessly up a mixture of degraded grass and loose stone to break the 800-meter contour line
Waypoints
Randerside, Great Dodd eastern flank, Great Dodd summit shelter
Decision point
The upward fall line is obvious; punch straight up the steep bank until the gradient suddenly flatlines on the vast summit plateau, where you can then locate the prominent stone wind shelter
Easy to get wrong
At a 16% average gradient over high-mountain terrain, this is the physical crux of the route. The final pull is physically draining, highly exposed to the wind, and in winter conditions, this slope can hold hard-packed snow and ice that demands crampons and an ice axe for a safe ascent
If you need to get off
If you are unable to crest the summit safely, turn around and carefully retrace your steps down the steep eastern flank to Randerside. Do not attempt to traverse horizontally across the steep face of Great Dodd, as the ground is heavily broken and precipitous
5
Great Dodd → Stybarrow Dodd (1.9 km, 74 m)
Climb of about 74 m over 1.9 km (around 4% average).
Traverse south along the magnificent, high-level skyline of the Helvellyn range, dropping gently into the broad, grassy saddle of Watson's Dodd before a mild pull brings you to the summit of Stybarrow Dodd. This is high-altitude, plateau walking at its finest, offering sweeping panoramic views on a clear day
Waypoints
Great Dodd summit, Watson's Dodd col, Stybarrow Dodd summit
Decision point
A well-worn, high-level trod connects the summits, but in mist or snow, relying entirely on rigorous compass bearings and pacing is absolutely mandatory to safely transit between the peaks
Easy to get wrong
The true danger here is navigation in poor visibility; the Dodds form a massive, rounded, and featureless plateau that looks identical in every direction when wrapped in thick clag. Whiteout conditions here have led countless walkers completely off course. Gale-force winds also violently funnel over these saddles
If you need to get off
If the ridge becomes violently inhospitable, you can push forward to Sticks Pass to find a reliable descent path, or retrace your steps to Great Dodd. Under no circumstances should you bail blindly to the west, where the terrain drops sheer into the craggy ravines of St John's in the Vale
6
Stybarrow Dodd → Hart Side (2.2 km, 11 m)
Descent of about 92 m over 2.2 km.
Leave the main spine of the Helvellyn range by turning sharply east, descending a long, broad, and grassy spur that drops steadily down to the modest, flat elevation of Hart Side. You will lose altitude quickly at first before the gradient shallows out into a sprawling, boggy moorland
Waypoints
Stybarrow Dodd eastern shoulder, Deepdale crossing, Hart Side summit
Decision point
You must commit to a strict easterly bearing when leaving Stybarrow Dodd; the top of Hart Side is barely a bump on the ridge, so trust your compass rather than looking for a prominent peak
Easy to get wrong
The spur heading east is incredibly broad, making it very easy to drift too far north or south off the optimal line. The shallow depressions leading to Hart Side hold notoriously deep, boot-sucking peat bogs that demand careful route-picking to avoid sinking in past your ankles
If you need to get off
You are already on a descent trajectory; if you need to escape the high fells quickly, simply maintain this easterly direction, which will safely funnel you down the grassy ridges toward the Ullswater valley
7
Hart Side → Birkett Fell (0.6 km, 2 m)
Undulating section of about 0.6 km.
Enjoy a fast, almost flat stride across the spongy moorland plateau, tracking north-east from Hart Side to cross the barely distinguishable, grassy top of Birkett Fell. The elevation barely changes, allowing you to cover this short distance in a matter of minutes
Waypoints
Hart Side, upland moorland, Birkett Fell top
Decision point
Maintain a precise north-easterly compass bearing from Hart Side; visual navigation is essentially useless here if the cloud base drops
Easy to get wrong
The terrain is trackless, featureless, and thoroughly saturated with water. The primary challenge is purely navigational, as Birkett Fell lacks any significant cairn or dramatic topographical feature to signal you have arrived
If you need to get off
There are no immediate hazards here; if disoriented, hold a bearing due east to drop safely off the edge of the plateau and onto the lower, more sheltered slopes above Ullswater
8
Birkett Fell → Brown Hills (1.6 km, 0 m)
Descent of about 171 m over 1.6 km.
Begin a committed, sustained descent down the north-eastern flanks of the fell system, losing significant altitude as you drop off the high plateau and onto the rolling, bracken-covered lower slopes that make up Brown Hills. The descent is grassy, largely pathless, and steadily steep
Waypoints
Birkett Fell eastern slopes, grassy descent face, Brown Hills ridge
Decision point
The distinct profile of the descending ridge line acts as your primary visual guide; simply follow the nose of the spur downwards as it sweeps toward the valley floor
Easy to get wrong
This steep, slick grassy descent is heavily punishing on tired knees. In wet weather, this face acts as a massive sponge, making the footing treacherous and prone to sudden slips. As you drop lower, summer bracken returns, hiding rocks and rabbit holes that can easily snap an ankle
If you need to get off
This stage is inherently an escape route; you are actively descending the mountain on a non-committing, safe trajectory that leads directly back to civilization
9
Brown Hills → Round How (2.2 km, 7 m)
Descent of about 187 m over 2.2 km.
Continue the eastward traverse, threading a path through the rolling, bumpy lower fells to drop further down the slope before crossing the small, rocky protuberance of Round How. The terrain is a mix of rough grazing pasture, rocky outcrops, and descending grassy ramps
Waypoints
Brown Hills, lower fell pathways, Round How summit
Decision point
Glimpses of Ullswater in the valley below act as a massive orienting handrail, ensuring you are continually moving in the correct overall direction toward the valley floor
Easy to get wrong
The paths here are fragmented by livestock, meaning you will likely be making your own way through thick bracken and over uneven, tussocky ground. The short pull onto the rocky top of Round How involves navigating a few minor rocky steps that require care when wet
If you need to get off
You are firmly in the lower foothills now; if needed, simply walk directly east or south-east downhill until you intercept the main valley road skirting the lake
10
Round How → Bracken How (0.3 km, 1 m)
Undulating section of about 0.3 km.
Make a very short, virtually flat crossing over rough grazing land to bridge the brief gap between Round How and the neighboring minor, grass-covered bump of Bracken How
Waypoints
Round How, rough pasture, Bracken How
Decision point
Bracken How is visible immediately in front of you; simply follow a direct line of sight to the minor summit
Easy to get wrong
This is a trivial transition stage, but the ground between the bumps is heavily rutted by livestock and holds deep, muddy puddles that can still soak your boots at the very end of the day
If you need to get off
Immediate descent to the valley floor is available by simply turning right (east) and walking downhill
Bracken How → Finish (0.6 km, 0 m)
Descent of about 70 m over 0.6 km.
Plunge down the final, steep grassy bank from Bracken How, navigating the thick lower bracken and crossing the final agricultural boundary walls to reach the valley road and complete the route
Waypoints
Bracken How descent, valley boundary wall, finish point
Decision point
The valley road below serves as a bombproof visual target; pick the safest, clearest line of descent through the pasture straight to the finish
Easy to get wrong
The final pitch is deceptively steep and notoriously slippery on tired legs. The dense vegetation at the valley floor hides loose rocks and uneven ground, so maintain concentration all the way to the tarmac to avoid a late injury
If you need to get off
You have successfully exited the high fells; this final descent drops you securely back onto the valley road and your starting point
In the order you walk them — the same numbers the elevation profile, the stage notes and the pacing table use.
🅿️ Getting there & parking
High Cascades (NT, paid) — 0.0 km from the start (straight line)
Walking base for Low How, High Brow, Randerside and Great Dodd — the 'Birketts above Ullswater' route starts 21 m away. Fees: £6 for 2 hours; £8 for 4 hours; £9.50 all day. Compacted surface (OSM-tagged). Free for NT members (checked Aug 2026).
Park Brow (NT, paid) — 0.5 km from the start (straight line)
Walking base for Low How, High Brow, Randerside and Great Dodd — the 'Birketts above Ullswater' route starts 455 m away. Also serves 'Gowbarrow Fell and Little Mell Fell'. Fees: £6 for 2 hours; £8 for 4 hours; £9.50 all day. Free for National Trust members. 508/509 bus stop nearby. Free for NT members (checked Aug 2026).
Aira Force (NT, paid) — 0.6 km from the start (straight line)
For Gowbarrow Fell and the path toward Great Dodd via Dockray. Fees: pay and display (LDNP directory, checked Aug 2026). Open Toilets open 10am-3pm; accessible toilet 24hrs (LDNP directory, checked Aug 2026).
🕑 Typically full before 09:00 on fine weekends, Apr-Oct — Lee McCoy, local observation, 2026-08-09.
Round How (layby) — 0.7 km from the start (straight line)
Walking base for Gowbarrow Fell (Wainwright summit) and Little Mell Fell — the 'Gowbarrow Fell and Little Mell Fell' route starts 394 m away. Free (OSM-tagged).
Vehicles are left entirely at their owner’s risk. We list places people park; we cannot vouch for any of them. Judge it on the day: take valuables with you, leave nothing on show, and if a spot feels wrong when you get there, park somewhere else.
The 509 stops at Dockray, outside The Royal Hotel, 750 m from this start. The last bus is 19:09 towards Troutbeck (UB1) and 18:02 towards Grasmere (559) and 16:12 towards Keswick (509), every day. Checked against the operator’s timetable, 7 September 2026. Times here are a guide, not a promise — leave yourself more than the minute.
The 509 passes this route at 0.7 km (Dockray, outside The Royal Hotel, 0 m off the line). Other services cross it too — 508 at 13.7 km.
Stagecoach 509
Penrith ↔ Keswick around Ullswater — calls at Pooley Bridge, Watermillock, Glenridding, Patterdale, Hartsop, Dockray, Matterdale, Mungrisdale and Threlkeld
Catch it from: Penrith · Keswick
The Ullswater side of the Penrith–Keswick corridor, and a second option where we previously showed only the 508. Reaches Helvellyn and Catstye Cam from Glenridding, Place Fell and Angletarn Pikes from Patterdale, the Hartsop fells, and Gowbarrow from Dockray. Frequency and season are not listed here because we have not verified a timetable — check Stagecoach before you rely on it. Note the Troutbeck on this route is the one on the A66 near Penrith, not the Troutbeck near Windermere.
If the first one is full, these do not all fill together. The 3 below sit in different places or are different kinds of parking, so a busy morning at one does not mean a busy morning at all of them.
Dockray (roadside)
Low How (layby)
Park Brow (NT, paid)
Worked out from the parking we hold within walking reach of this route and the other walks each place serves — two places that serve the same walks fill for the same reasons. We are not saying whether anywhere has spaces today, and we never will: this is what exists, not what is free.
The only property in the cluster that answers the whole arrival sequence for a family: a drying room in the all-rooms facilities list, a cot and a high chair, children of all ages accepted, and an honest note that its ground-floor room is still reached by steps. It is also the only page in the radius that describes this exact walk from its own door - Gowbarrow Fell to Aira Force and back through Matterdale - and Little Mell Fell, the second summit of one of the routes this start serves, is the fell behind the house.
Most of the furniture in the rooms was made by hand in Tanzania, where the owners used to run a business organising Kilimanjaro climbs.
Drying room“The following are available for all rooms: Television,DVD player, Hairdryer, Tea/Coffee making facilities, Use of garden and patio, Use of guidebooks and other books, Maps (for planning and laminated for walks), Drying room, and Fridge (in the Dining Room).”
Family rooms“We have a cot, high chair(s) and special cutlery for small children.”
Parking“Another alternative is to use what3words where our car park is primed.lavished.amounting”
Children“Children Welcome We are very happy to welcome children of all ages.”
The best answer in the cluster for a party with a dog, a small child and tired knees at once: single storey, sleeps seven, cot available, off-road parking, drying facilities and a coin laundry, with hot food available from the hotel kitchen so nobody has to drive at seven in the evening. The price of all that is a three-night minimum with fixed Friday and Monday changeover, which is why the minimum-stay line matters more here than anywhere else in this list.
The Ullswater Steamer jetty at Howtown is reached from the cottage by footpath, so the lake boat can be walked to rather than driven to.
Drying room“Ample storage and drying facilites Very spacious, comfortable lounge Fully fitted dining kitchen”
Dogs“Low Gale Ullswater is an elevated single storey, dog friendly holiday cottage located just beside Fusedale Beck and can easily accomodate 7 people.”
Family rooms“Cot available Dishwasher *Washing Machine 2 bathrooms 1 double bedroom 2 twin rooms 1 single room”
Evening meal“visitors can cook local fayre or alternatively take advantage of the dine at home meals available from the Hotel kitchen.”
Parking“Facilities Free Superfast Broadband Dog friendly Off road parking Smoke-free Garden / Patios Cot available Dishwasher *Washing Machine”
Worth knowing before you book
These places state on their own site that they do not take children.
What each place says about itself, quoted from their own site. We have not stayed at any of them, and there are no prices, no booking and no affiliate links. Distances are straight lines from the route start, never walking times. Properties found via OpenStreetMap (opens in new tab).